Categories
Recipes

cheese pupusas with pickled slaw

We were in the car on our way to go surfing last weekend when Jordan turned to me and said, “Let’s make pupusas”. “Sure, let’s do it,” I replied without blinking an eye. It was decided, pupusas for dinner. What about the winding drive up Highway 1 made him think of pupusas, I have no idea. What I do know is that when you’ve been cooking and writing about it long enough, you tend to dive headfirst into this type of thing. We stopped questioning each other’s food whims long ago. Semi-obscure regional dish, why not. Grind our own meat for a three pound loaf of country pate, seems reasonable. Wedding cake in one hundred square feet of kitchen, it’ll be fun. Unlike most other areas of my life, the kitchen seems to be the place where I have the guts to just go for it. No questions, no fear, no regrets. Behold, PUPUSAS!

pupusa-7

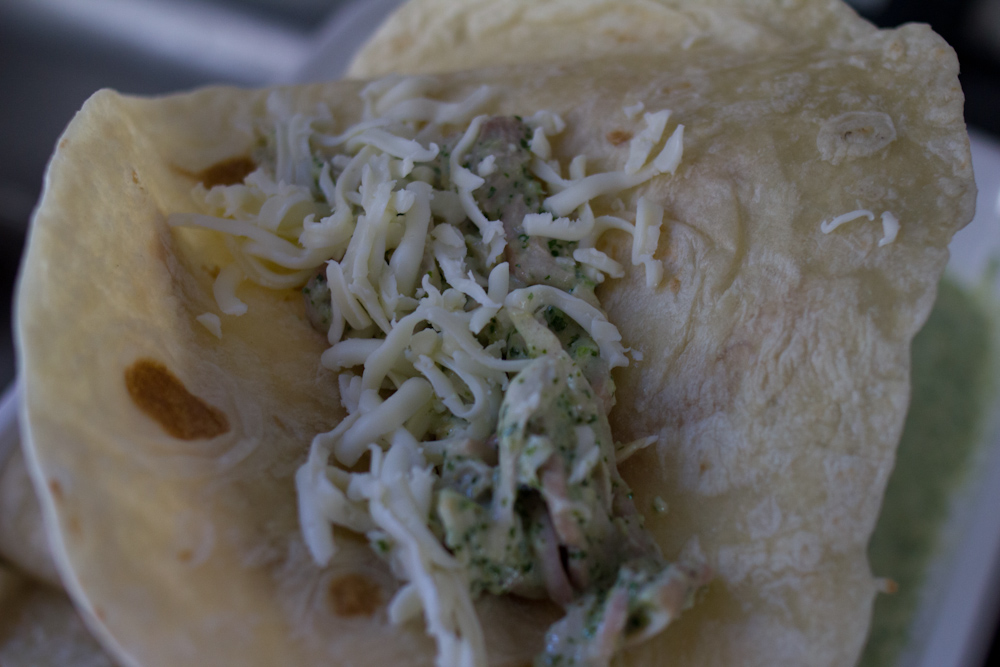
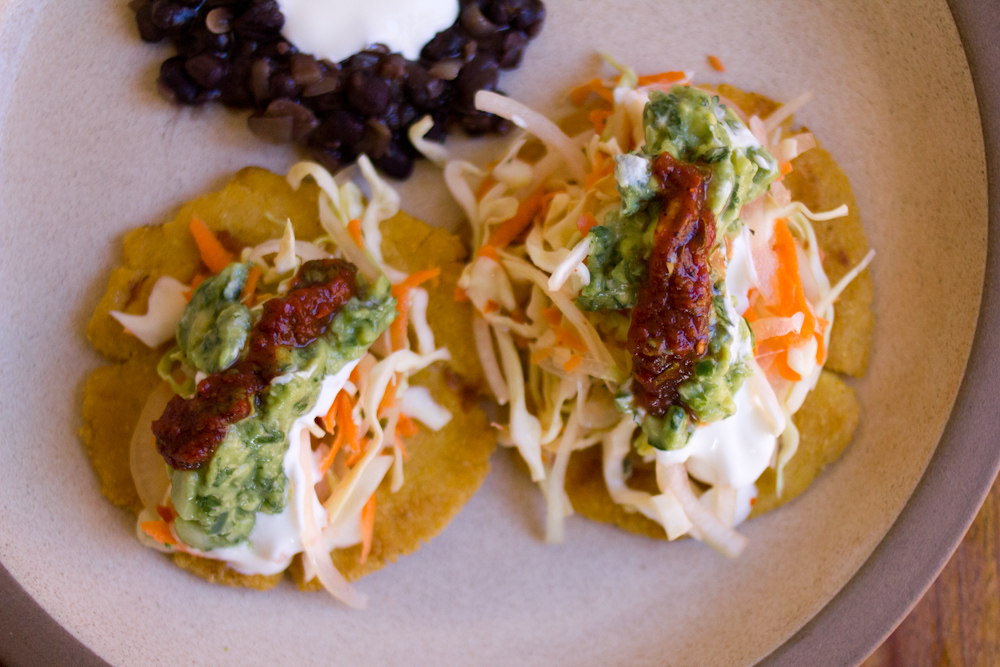
Now isn’t that pretty. Maybe I should get ‘no fear, no regrets’ and a sexy papusa tattooed on my arm as a reminder to be more adventurous in the rest of my life …

Pupusas are traditional dish from El Salvador. They’re basically a corn dough that is filled with a mixture of cheese, beans or braised meat, flattened into a half inch thick disc and then pan fried or cooked on a grill.  Although I do indeed have an adorable Salvadoran grandma, I haven’t yet had the chance to learn how to make pupusas autenticas. It’s on my list, but in the meantime, I’m working off of this recipe. It’s a fusion of a several recipes found on the internet, and despite it’s lack of pedigree it turned out pretty dang delicious. It’s hard to go wrong with cheesy corn bread topped with tangy spicy slaw, wouldn’t you agree?

Pupusas de Queso con Curtido 
For the pupusas
2 cups masa harina (Maseca is a common brand, Bob’s Red Mill also makes one)
1 1/3 cups warm water
1/2 teaspoon salt
1 cup grated mozzarella, monterey jack or quesillo cheese
butter or oil for cooking them

First, grate the cheese. Then make the masa. In a large bowl, combine the masa harina, salt and warm water. Using your hands, mix the dough until a soft and just slightly sticky dough forms. You’ll just need to knead it for a minute or two. If it is too crumbly, add some more water. If it is too wet, add a few tablespoons of masa harina. Let the dough sit for 10 – 15 minutes to let the masa harina fully hydrate.

pupusa-2

Shape the dough into eight 2″ balls. Press your thumb into the center of the ball and pinch it into a bowl shape using your thumb and fingers. Fill the hole with about a tablespoon of cheese (or other filling like refried beans or braised pork). Pinch the edges of the bowl closed to cover the cheese. Then flatten the ball into a disc using your hands. Flatten a until the disc is about 1/3″ thick. Repeat with the rest of the balls of masa. Refrigerate until you’re ready to fry up the pupusas.

pupusa collage

We made this little video of how to shape the pupusas if my explanation above confuses more than it helps. Cinematography is not a strength here at the Answer is Always Pork, but this will get the job done.

For the curtido
1/2 head of cabbage, sliced thinly
1 carrot, grated
1 onion, sliced thinly
1/2 cup apple cider vinegar
1/4 cup water
1 teaspoon salt
1 teaspoon brown sugar
1 teaspoon dried oregano
1/2 teaspoon chili flakes

pupusa

In a large bowl, combine the sliced cabbage, carrot and onion. In a small bowl, combine the vinegar, water, salt, sugar, oregano and chili flake. Whisk to dissolve the sugar and salt. Pour over the cabbage mixture. Cover and refrigerate for a few hours or overnight.

In a sauté pan over medium heat, melt some butter or heat some oil. Cook the pupusas, about 5 minutes per side, until golden brown all over and deep brown in spots. You’ll see the cheese start to ooze out of them. Serve topped with the curtido, plus some guacamole, crema and salsa if you’re a Californian and bastardizing traditional foodstuffs is right up your alley. Buen provecho!

pupusa-8

-Emily

Categories
Recipes

lentil stew with sesame rice

lentil-stew-6

We didn’t really eat lentils much until a dinner at our friend Ted‘s house almost two years ago. He made a delicious Indian-spiced lentil dish and we got hooked—Ted’s lentils were that good. On the whole, lentils are tasty, cheap and versatile. I’ve been trying different recipes here and there, and though I cannot seem to reproduce Ted’s, this has been one of my favorites that I’ve tried.

Like most stews, this one only gets better as it sits. The flavors meld and develop over time and it goes from pretty good to really good in about two days. If you have the foresight, make it a day or two ahead of serving it. Also, the lemon really makes this stew. It adds such a perfect brightness to the dish. It might seem weird to put lemon slices in a stew before you simmer the thing for 30 minutes, but it turns out great. Don’t skip it!

Lentil Stew with Sesame Rice, adapted from The Kinfolk Table 
1 cup red or yellow lentils
1 onion, diced
4 cloves of garlic, minced
1 – 1.5″ piece of ginger, minced
1 teaspoon ground cumin
1/4 – 1/2 teaspoon cayenne pepper, depending on how spicy you like it
1 – 15 oz can of diced tomatoes
1 lemon, sliced into rounds
3 cups chicken or vegetable stock
olive oil
salt & pepper, to taste
chopped cilantro, parsley or green onion for garnish

Rinse the lentils in cold water until the water runs clear.

lentil-stew-2 lentil-stew-1

In a dutch oven, heat a tablespoon or two of olive oil over medium heat. Add the onion and saute until translucent, about 7 minutes. Add the garlic, ginger, cumin and cayenne and saute a few minutes more. Add the tomatoes, stock, lentils and lemon slices. Turn the heat to low and let the stew simmer for 20 – 30 minutes, until the lentils are tender. If you’re eating your stew the next day, turn off the heat and stash your lentils in the fridge. If you’re eating that night, let the lentils simmer away until your rice is cooked.

For the rice
1 cup brown rice (or white rice, though the nuttiness of brown rice goes well with this stew)
2 cups water (or according to your rice cookers directions – rice cookers know all)
3 tablespoons toasted sesame seeds
1 teaspoon salt

Now brown rice takes a long time to cook. Plan for double the cooking time of white rice so about an hour on the stove or two hours in a rice cooker. If your rice cooker has a self-timer, use it. If it doesn’t, start the rice before you start the stew or the second you walk in the door after work.

I’m mentioning this because you, like me, might not be familiar with the intricacies of brown rice. You might realize only after you get home from work ravenous at 8pm that brown rice has 2 hour (!) cooking time. This news might force you to lie in dismay on the floor while your knight in flannel and skinny jeans orders Japanese takeout. Are you sensing a theme?

lentil-stew-3

While your rice is cooking and stew is warming, toast the sesame seeds in a pan over low heat until they are fragrant. Once the rice is cooked, mix them into the rice, saving a few for garnish.

To serve, ladle the stew over the rice. Top with some cilantro, parsley, green onions or sesame seeds—whatever you’ve got in the fridge will do—and enjoy!

lentil-stew-4

-Emily

Categories
Recipes

chickpea lavash wraps

chickpea-lavash-wraps-3

Chickpea Lavash Wraps
For the chickpea spread
1-15 oz can of chickpeas, drained
1 lemon, zested and juiced
1/2 red onion, chopped
a few tablespoons fresh parsley, chopped
2/3 cup plain yogurt
salt and pepper

For the cucumber-yogurt dressing
1 medium cucumber, diced or sliced
2/3 cup plain yogurt
1/2 lemon, zest and juice
1 clove garlic, diced or grated
salt and pepper

To assemble 
2 cups spinach
1 bell pepper, sliced
sriracha
2 pieces lavash bread
1 tablespoon butter

chickpea-lavash-wraps-1 chickpea-lavash-wraps-2

In a food processor, chop up two-thirds of the chickpeas. Put in a medium bowl and add the rest of the chickpeas, lemon zest and juice, onion, parsley, and yogurt. Season with salt and pepper to taste. Set aside. This spread can be made a day or more in advance. After sitting in the fridge for a day or so, the flavors melt together and it gets even better.

chickpea-lavash-wraps-6 chickpea-lavash-wraps-7

In a small bowl, combine chopped cucumber, yogurt, lemon juice and zest,  garlic, salt and pepper. Stir to combine. This dressing can be made a day or more in advance as well.

To assemble, lay a lavash bread on the counter. Spoon some of the chickpea spread and some of the yogurt dressing onto the lavash. Add some sriracha for heat.  Add a handful of spinach and a few slices of bell pepper. Roll it all up like a burrito.

chickpea-lavash-wraps-4

In a saute pan, melt the butter over medium heat. When the butter is foaming, add the lavash wrap. Toast each side and serve.

chickpea-lavash-wraps-5

Categories
Recipes

pizza with goat cheese, corn, poblanos and cilantro

This recipe was inspired by a conversation with our friend Alexa. She saw something like it on Sprouted Kitchen, improvised with what she had in the fridge and voila, dinner. Her description sounded so good and I had almost all of the ingredients already, so I too improvised and mine also turned out delicious.

The flexibility of pizza as a medium really is awe-inspiring. The fact you can make a decent pizza with just about whatever configuration of cheese and veggie you happen to have on hand—magic.  This fact also makes bad pizza even sadder if you stop to think about it.

pizza-corn-poblanos-5

We’ve made this pizza a few time since Alexa first told us about it and finally wrote up the recipe. You’ll probably want to make it this weekend—the end of summer (and corn season – even in sunny CA) is nigh.

Pizza with Goat Cheese, Corn, Poblanos and Cilantro
1 ball of pizza dough, divided in two and at room temperature for ease of shaping
1/4 cup sour cream, creme fraiche or mexican crema (whatever you’ve got around will work)
1 poblano pepper, charred and diced
1 ear of corn, cut off the cob
1/4 red onion, sliced thinly (or yellow onion, or shallot)
1/4 cup goat cheese, crumbled
1 – 2 limes, depending on how juicy they are
a small handful of cilantro, chopped
2 tablespoons olive oil

Under the broiler, over a gas flame or on the grill, char the poblano. Let it cool and then cut it into small pieces, discarding the seeds. Cut the corn kernels off the ear. Slice a small onion thinly.

pizza-corn-poblanos-1 pizza-corn-poblanos-2

Preheat your oven to 500°. Move an oven rack with pizza stone—if you’ve got one—to very top of your oven. Roll out the pizza dough as thin as you can get it. If you let the dough sit out for an hour or two at room temperature before shaping it, it will be easier to get the crust thinner. Once it is rolled out, dust your pizza peel or baking sheet with corn meal or flour. Place the dough on the pizza peel or on baking sheet. Time to top!

pizza-corn-poblanos-4 pizza-corn-poblanos-3

Coat the dough with a thin layer of sour cream. Sprinkle on the poblanos, corn, onion and goat cheese. Brush some olive oil onto the parts of the crust that aren’t covered in sauce or toppings. Slide it onto your pizza stone or cook on the baking sheet for 15 – 20 minutes, until the crust is browned. Meanwhile, mix together the lime juice, olive oil, and cilantro. We used our magic bullet, but you could also just chop the cilantro and mix in a bowl. When the pizza comes out of the oven, drizzle on the cilantro-lime dressing and serve.

Speaking of perfect pizza, I wish we had a backyard of sorts so we can get this rad, tiny, wood-fired pizza oven and turn out even more delicious (wood fired!) pizzas in less than 5 minutes a pop. I would have homemade pizza at least once a week if I was the proud owner of one of those cuties.

-Emily

Categories
Recipes

sushi

We’ve talked about how I have Jordan to thank for my love all foods fishy. Well, my gateway fish dish was sushi. It started innocently enough with a shrimp tempura roll, maybe some seared BBQ tuna, but soon morphed into hook me up with that chirashi, and stat. I love sushi, especially simple sushi. Vinegar rice + raw fish = perfection.

sushi-7

Which brings me to my next point, it is really hard to hide bad rice (or bad fish, but we’re not going there) when your dish has just two ingredients. Sushi rice is a special thing and insanely hard to make if you don’t have a decent rice cooker. The texture is paramount and we’ve struggled for years to get it right. First we gave it a go in a pot on the stove, and then in a subpar rice cooker. There were tears.

japantown-photo-square

And then for my birthday we went to Japantown. We looked at all the cute things (!!!), took some purikura photos and spent an hour and half in the Japanese supermarket. The very best part of the day (a tough call for me because I love just about everything Japantown has to offer) was that Jordan bought me my very own Zojirushi NeuroFuzzy rice cooker. It has a little computer inside. It sings to us when it starts and finishes the rice. You can customize the hardness or softness of your rice. You can keep rice warm in the cooker for days and it still tastes pretty darn good. NeuroFuzzy is amazing and will make you perfect sushi rice. It is also a very romantic gift.

sushi-1

Armed with a decent rice cooker and access to sushi-grade fish (YAY, JAPANTOWN!), we’ve been reveling in perfect chirashi. So simple and fresh and good. I am so happy. Sushi-happy, which I’m sure must be a phrase in Japanese, if only I spoke it.

Chirashi Sushi
For the sushi-su
1/4 rice vinegar
2 tablespoons sugar
2 teaspoons salt
2 cups sushi rice
your favorite raw fish, sliced thinly

Make the rice according to your rice cooker’s instructions. Rice cookers know all. In a small pan over low heat, heat the rice vinegar, sugar and salt and mix until combined. Remove from the heat and let cool. Once the rice is finished cooking, transfer it to a large shallow bowl. Drizzle the sushi-su over the rice and stir the rice gently to incorporate the sushi-su and cool the rice.

sushi-4 sushi-2

Thinly slice your fish using the sharpest knife you’ve got. Mound a small pile of rice on a plate and top with slices of fish. Serve with soy sauce, wasabi and pickled ginger.

sushi-5 sushi-6

And lastly, if I wasn’t already obsessed with Japan (so much cute!) and Japanese cuisine, we watched this fantastic documentary that transformed the way I look at sushi. I also recently read this wonderfully funny book that made me want to travel to Tokyo and eat everything, immediately.

-Emily

sushi-3

Categories
Recipes

vegetable ‘ceviche’ salad

vegetable-ceviche-6-1

Jordan and I stumbled upon a recipe for vegetable “ceviche” when we were on a plane to Idaho a few weeks back. At first I thought it just sounded silly, like vegetarians trying too hard. For something to be ceviche, fish is a requirement. But, we let the thought marinate (ha), made the dish, and it was tough to come up with something else to call it. Diced raw vegetables with lime juice doesn’t quite have the same ring to it.

So here we are, eating ceviche sin pescado and liking it. Liking it a lot. Chop up a little of whatever summer produce you’ve got hanging around, mix that with a ton of lime juice, some cilantro and an onion. Let the mixture sit together for an hour or two and call it dinner. Ceviche bonus points if you’re into practicing your knife skills and everything you dice comes out perfectly uniform. Ladies and gentlemen, let it be known, my man can dice like the best of ’em.

vegetable-ceviche-1vegetable-ceviche-3

Vegetable ‘Ceviche’ Salad 
2 ears of corn, cut of the cob
2 cucumbers, diced
3 tomatoes, chopped
1 red onion, diced finely
3 sweet peppers, diced
2 avocados, cut into cubes
1 bunch cilantro, choped
3 limes, zest of 1 and juiced
salt

In a large bowl, mix together corn kernels, diced cucumber, chopped tomatoes, diced sweet peppers, diced red onion, chopped avocado and cilantro. Douse liberally with lime juice and season with salt. Let sit at room temperature for an hour or two. Stir again and serve.

vegetable-ceviche-5

Because of all the lime juice, this salad survives quite well in the fridge for a few days.

vegetable-ceviche-7

-Emily

Categories
Recipes

enchiladas suizas

enchiladas-suizas-1-text
I’ve been thinking about making these enchiladas for months. Correction, I just looked at the issue of Saveur from whence this recipe came and it was the August/September 2012 issue.  So I’ve been dreaming of these enchiladas for a year. I saw their picture in the magazine and knew I had to eat them. When we discovered a few weeks ago that there was indeed a latino market in our neighborhood (I cannot explain why this discovery took three years), my dream was realized.

Enchiladas suizas are a specialty originally served in a Mexico City department store called Sanborns. Their recipe is apparently the best and while there are stateside renditions, those supposedly pale in comparison. Chicken-filled tortillas blanketed in a creamy tomatillo salsa, topped with salty, melted cheese. Ya, I can see how those would win an enchilada contest.

And so I made them. And they are indeed amazing. They make all the other enchiladas feel sad and inferior with their spicy, tangy, creamy, cheesy majesty. Now every time I have enchiladas, I will wish they were these enchiladas. If that doesn’t convince you to make them, you cannot be saved.

enchiladas-suizas-8enchiladas-suizas-13

Enchiladas Suizas, adapted from Saveur Magazine, Aug/Sept 2012
2 lbs tomatillos, husks removed and rinsed
2 serrano chilis, stemmed
2 poblano chilis
1 cup cilantro, roughly chopped
1 cup sour cream
1/2 teaspoon cumin
4 cloves garlic, roughly chopped
kosher salt, fresh black pepper
8 corn or flour tortillas
3 cups cooked shredded or chopped chicken
1 1/2 cups grated queso Oaxaca (or mozzarella)

The first question is, do you have shredded chicken sitting in your fridge? You do, you lucky duck. You don’t, no problem. Heat your oven to 425° F. In a small baking dish, bake four boneless, skinless chicken thighs for about 20 minutes, until the internal temperature is 165°. Take them out of the oven, let them cool and chop or shred with a fork, depending on your preference.

enchiladas-suizas-4

Arrange your oven rack to be four inches from your broiler and heat broiler to high. Line a baking sheet with tin foil. Broil tomatillos, serranos and poblanos, until blackened, turning occasionally to brown all sides. Let cool for about 10 minutes and discard any skins. I did a half-hearted job of removing the skins and it turned out just fine. Remove the stem and seeds from the peppers and chop into rough chunks. Transfer tomatillos, serranos and poblanos to a blender or food processor. Add the cilantro, cumin, garlic, and a pinch of salt. Plus to combine. Add the sour cream and whizz until smooth. Taste for seasoning. Season with more salt and pepper.

enchiladas-suizas-5enchiladas-suizas-6

To assemble, coat the bottom of a baking dish with about 1 cup of the sauce. In a large bowl, combine chicken with 1 cup of the sauce. Toss to coat all the chicken. Grate the queso Oaxaca. If using corn tortillas, you’ll need to fry them for a minute or two in some vegetable oil so that they are pliable enough to roll into tubes. If you’re a gringa and have an undying love for flour tortillas, you’re good to go.

enchiladas-suizas-7

Divide sauced chicken evenly among the tortillas. Sprinkle with a little bit of cheese and add to the sauce-coated pan. After you’ve rolled all the enchiladas, cover the dish with the rest of sauce and sprinkle with a healthy dose of cheese.

enchiladas-suizas-9 enchiladas-suizas-11

Heat your oven to 375° F. Bake enchiladas until the sauce is bubbling and the cheese is melted, about 25 minutes. Take care not to bake the enchiladas too long, you don’t want that luscious sauce to evaporate. Remove from the oven and let cool 10 minutes. Serve with plenty of sauce, crema and the salsas of your choice.

enchiladas-suizas-14

Pico de Gallo
1 lb fresh tomatoes, chopped
1/2 red onion, diced
1/2 bunch cilantro, chopped
1/2 – 1 jalapeño, stem and seeds removed, diced (depending on how spicy the pepper)
2 – 3 limes, juiced
salt

In a medium bowl, combine tomatoes, onion, cilantro, jalapeño and lime juice. Season with salt.

enchiladas-suizas-2

Roasted Corn Salsa
2 ears of corn, roasted over a gas stove, broiled or grilled
1/2 red onion, diced
1 – 2  limes, juiced
salt

Roast your ears of corn over a gas flame, until they are browned in parts, but still uncooked in others. Cut the corn off the cob. Combine in a medium bowl with the red onion and lime juice. Season with salt.

enchiladas-suizas-3enchiladas-suizas-12

Quick and Easy Black Beans
2 cans black beans
1 small onion, diced
3 cloves of garlic, chopped
olive oil
salt, pepper
ancho chili powder

In a medium sauce pan over medium-low heat, saute the onion until translucent, about 8 minutes. Add the garlic and saute another minute more. Add the cans of black beans and their juice. Reduce heat to low. Season with salt and pepper. Add a good pinch of ancho chili powder. Ancho chili powder is great in this recipe. It adds smokiness and depth, and because black beans have such a mild flavor, the ancho is able to really shine. Simmer until about half of the liquid has evaporated. Serve topped with crema.

enchiladas-suizas-15

-Emily


Categories
Recipes

fresh corn risotto

We’ve been on a serious corn kick lately. Summer corn is just so irresistible. Sweet, fresh, and crunchy—I want it on everything. This is our summer take on a winter favorite, leek and butternut squash risotto. I’ve swapped the butternut squash for corn and topped it with a fresh tomato ‘salsa’ to give it the extra acidy I crave in warmer months.  It was so easy to build off of this risotto base—it’s impossible to go wrong with rice, white wine, cream and parmesan—and this variation turned out beautifully. I’m brainstorming combinations for each season so stay tuned.

corn-risotto-1

Fresh Corn Risotto with Tomato Salsa 
2 medium spring onions, diced (or 1 large yellow onion or 3 leeks)
2 tablespoons butter
2 tablespoons olive oil
2 cups arborio rice
1/2 cup dry white wine
6 cups vegetable broth (chicken broth would also do just as well)
3 ears of corn, cut off the cob and cobs scraped of their juice
1/2 cup cream
1/2 cup parmesan cheese, grated
salt and pepper
2 tomatoes, chopped
1 tablespoon chives, minced

corn-risotto-3

In a medium saucepan, bring the stock to a simmer. In a large, heavy bottomed pot, heat the butter and olive oil over medium heat. Saute the onion until translucent, about 10 minutes. Add the rice and stir until the outside of the kernels becomes translucent and a few are starting to brown, but the inside is still white. Add the wine and simmer until absorbed, stirring constantly.

corn-risotto-4

Add the stock, 1/2 cupful at a time,  stirring until it is absorbed. Continue to add stock by the 1/2 cupful until the rice is tender and the mixture has thickened, stirring frequently with each addition.

corn-risotto-2

While your risotto is cooking, chop the tomatoes into small chunks and mix with the minced chives. Add a little sprinkle of salt.

Once you’ve incorporated all the broth and the rice tender, add the corn, cream and parmesan. Cook for a few more minutes to cooke the corn. Season with salt and pepper. Serve warm with a spoonful of the tomato salsa on the top!

corn-risotto-5

-Emily


Categories
Recipes

pesto pasta salad

Last week I was lucky to attend an awesome blogging conference Alt Design Summit. It was fun and inspiring and I’m buried under a mountain of insanely cute business cards from all of my new bloggy friends. I’ll share more soon, but since I know you’re hungry, here is a recipe for a quick, easy and delicious pesto pasta salad.

+++

Pesto pasta is an old standby here. I make it about every other week in the summer when basil is in season and readily available. We usually have it for lunch over the course of a few days. It is fresh, flavorful and cheap. Plus you can through a little of whatever you’ve got lying around in it and it still turns out pretty good. I guess pesto just works miracles like that.

pesto-pasta-4

Pesto Pasta Salad
For the pesto
1 bunch basil (we used a small bunch of basil and some arrugula which was a day or two past its prime)
1 lemon, zest and juice
1-2 cloves of garlic
1/4 cup nuts (pine nuts are the standard, but we’ve used pecans and walnuts also)
1/4 cup parmesan cheese
1/4 olive oil
salt and pepper

pesto-pasta-2

In the bowl of a food processor combine basil, lemon zest, lemon juice, garlic nuts and parmesan. Pulse until you’ve got a coarse paste. Now turn the food processor on and drizzle olive oil in through the top hole until the pesto comes together and everything is chopped uniformly. Season with salt and pepper.

For the pasta salad
1 lb dry pasta
1 can whole pitted olives
8 oz mini mozzarella balls
1 cup cherry or grape tomatoes, cut in half
1 batch of pesto

pesto-pasta-1

Bring a pot of water to boil. Salt it until it tastes like sea water. Cook the pasta according to the package directions. Drain and rinse for a minute or two with cold water. Combine pasta, olives, mozzarella, tomatoes and pesto in a large bowl. Stir to combine. Serve at room temperature or cold.

pesto-pasta-3

This pasta salad recipe is super flexible. You can add more veggies—blanched green beans are great, kidney beans or chick peas are a good way to make it heartier, marinated artichokes would be lovely too! Just remember that more sauce is better when you’re making a pasta that you’ll refrigerate and eat over a few days. Without enough sauce, the pasta will seem dry, bland and rather sad.

-Emily

Categories
Recipes

trout with creamed corn

Shall we talk some more about fish?

Butterflied trout really are a perfect fish. Tender, mild meat, no pesky bones or guts to get in your way because the fishmonger took care of that for you, affordable and sustainably harvested. Plus, for something that cooks in about 10 minutes, they still manage to look quite impressive. I’m of the mind that whole fish are always impressive. You?

trout-creamed-corn-7

And, now that July is here and summer is in full swing, it is time for everyone to get on this creamed corn. Originally from Thomas Keller’s Ad Hoc at Home, we’ve made a few tweaks so it pairs a bit better with the fish and eliminates some of TK’s meticulous technique. This creamed corn is good, really good. If you’ve only ever had creamed corn from a can, this is an entirely different world. One you want to live in. Forever.

trout-creamed-corn-6

Now go get yourself some summer corn, a few fish and make this gorgeous dinner in 30 minutes. I’ve already done it twice. The recipe below serves four, so cut it in half if you’re cooking for two. While the corn makes good leftovers, the same can’t really be said about the trout.

Creamed Corn
4 ears fresh corn, cut off the cob
2 tablespoons butter
1 lemon, zested and juiced
3/4 cup cream
1 tiny pinch of cayenne
2 tablespoons chives, minced
salt, pepper

trout-creamed-corn-1

Cut the corn off the cob. Scrape the cob with the back of a knife to get the rest of the corn flesh. In a heavy saute pan over medium-low heat, combine the fresh corn, butter and lemon juice. Cook the corn for 5 – 7 minutes. Season with salt.

trout-creamed-corn-4

Add the lemon zest and cayenne. Add the cream and cook for another 10 – 12 minutes, until the cream sauce has thickened. While the corn is cooking with the cream, cook the fish. Check for seasoning,  add a little pepper and the chives. Serve fish with a bed of creamed corn underneath it.

Butterflied Trout with Lemon Butter Sauce
2 – ~1lb butterflied trout (I think half a trout per person is good, but it depends on their size)
2 tablespoons butter
2 tablespoons olive oil
3 – 4 cloves garlic confit (if you don’t have any on hand, just skip it)
1 lemon, juiced
salt and pepper

trout-creamed-corn-2

Season the inside and outside of the trout with salt. In a large saute pan, melt the butter and olive oil over medium heat. Add the garlic confit and smoosh the cloves a bit.

trout-creamed-corn-5

When the butter and oil mixture is hot, add the trout. Put it in the pan skin side down, spread flat. Cook for 7 – 10 minutes, basting the top occasionally with the butter. Because the fish is thin, you don’t need to flip it.  This way the skin gets super crispy, but the fish doesn’t dry out. Just before serving, squeeze a lemon over the fish and add some freshly ground pepper. Serve on top of a bed of creamed corn with a salad or alternatively with roasted summer squash and potatoes anna.

trout-creamed-corn-8-Emily