Categories
Recipes

pasta with creme fraiche, kale and mushrooms

Each year, we have what we’ve come to call the “pasta of the year”.  The pasta of the year is a pasta dish that we turn to for a reliably tasty and soul-satisfying dinner every other week or so. It quickly becomes part of our regular weeknight dinner repertoire, dominates for nearly a year, and then mysteriously fades away, only to be rediscovered occasionally by browsing our own blog archives. It’s a strange phenomenon, but we’ve come to accept it’s benevolent presence in our lives.
pasta-of-the-year

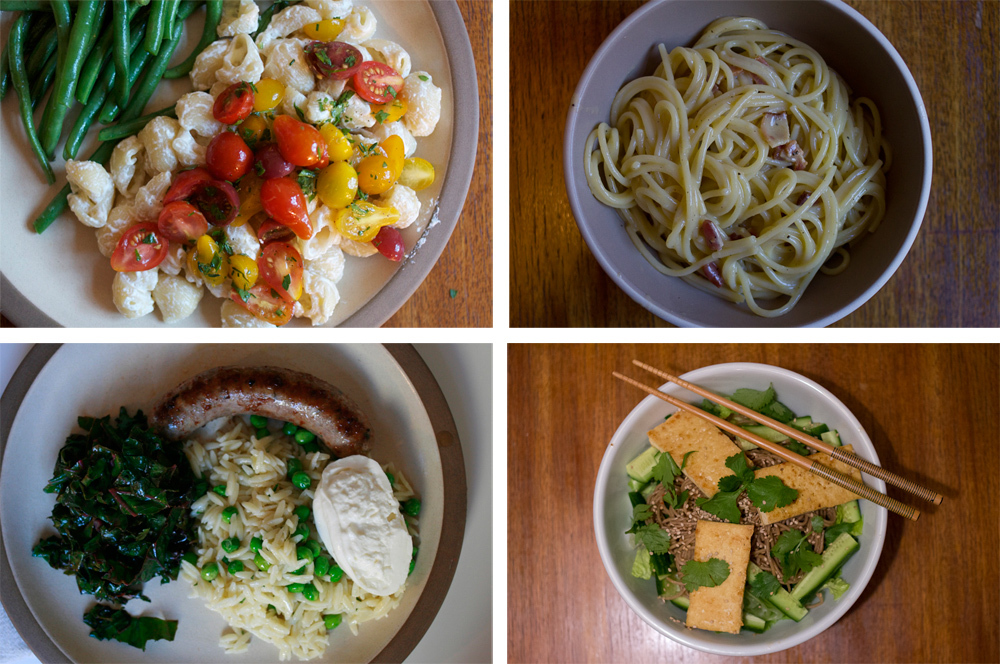
The pasta that started it all was a marinated tomato and ricotta pasta. You’d let some peak of summer tomatoes hang around with fresh herbs, olive oil and lemon juice for 20 minutes or so. Then toss your pasta with an excess of ricotta cheese and top that with the marinated tomatoes. Heaven from June through September.

There was the pasta carbonara kick, which featured an incredibly poetic post from Jordan about his love for the dish. And then there was orzo topped with burrata cheese. My spicy soba noodle salad was certainly a contender in 2014.

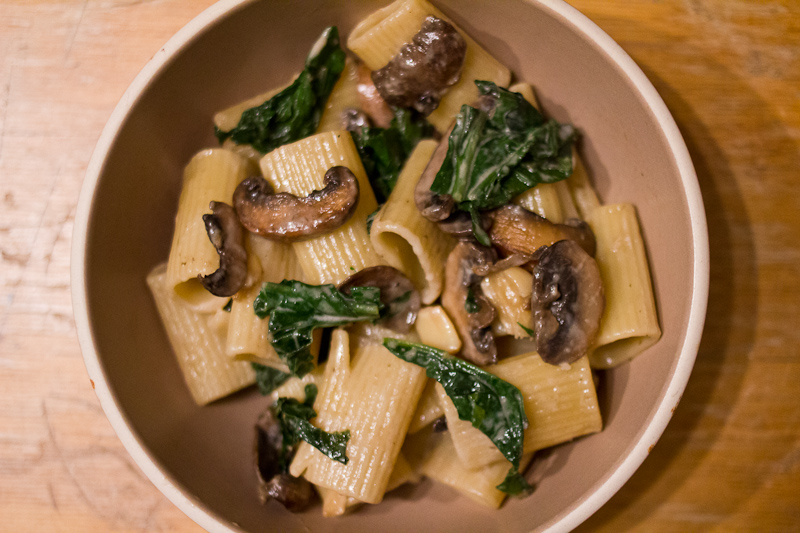
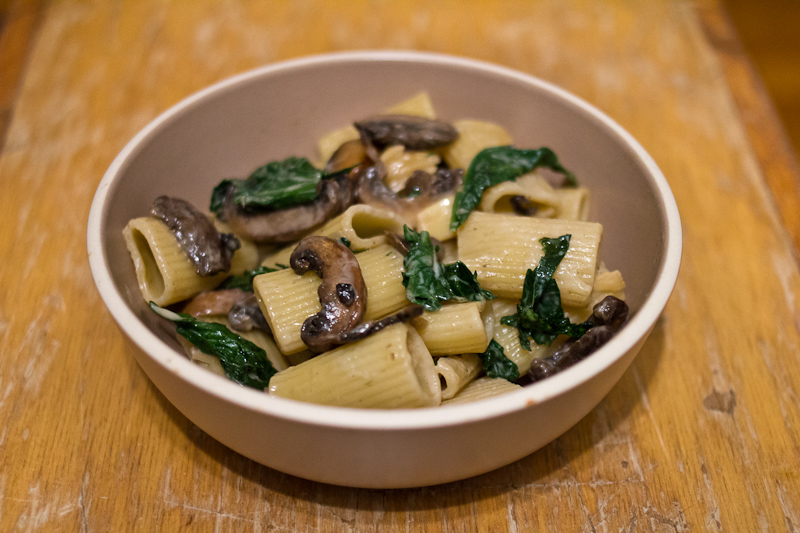
And now, though the soba noodle salad is making an honorable attempt to defend the title in 2015, we have our new favorite pasta equation. Pasta + creme fraiche + sautéed shallot + wilted green, and it’s sister pasta, pasta + creme fraiche + shallot + al dente veg. Creme fraiche is a genius way to arrive at a solidly sauced pasta with nearly no effort, and we’ve already established that shallots are good on everything. Toss in whatever green or quick-cooking veggie (mushrooms, asparagus, green beans, favas, peas) you have around and you’ve got yourself a supremely delicious, decently well-balanced meal. If you happen to live at our house in the winter/spring of 2015, you have this pasta every 10 days.
pasta-creme-fraich-kale-2

Pasta with Creme Fraiche, Kale and Mushrooms
1 lb pasta
1 shallot, diced
2 cups (8 oz) cremini mushrooms, sliced
2 cups kale, sliced
2 tablespoons butter or olive oil
1/2 cup creme fraiche
salt and pepper

Bring a pot of salted water to boil. Dice your shallot and slice your kale and mushrooms. Throw your pasta into the pot of boiling water to cook.

Meanwhile, in a sauté pan over medium heat, melt the butter, and sauté the mushrooms. When the mushrooms are nearly done, add the shallot and sauté just a few minutes more. Taste your mushrooms and season them with salt. Then add the kale. Turn the heat off and just let the kale wilt a bit.

Drain your pasta and add it back into the pot. Throw the mushroom mixture into the pasta pot, along with a generous dollop of creme fraiche. Stir to distribute the creme fraiche. Season with bit more salt and pepper, and serve. Feel free to embellish with parmesan cheese and herbs, though it isn’t necessary.
pasta-creme-fraich-kale-1

-Emily

Categories
Recipes

chili verde

I’d always been opposed to the idea of owning a crock pot. Our apartment is so tiny and it doesn’t seem possible to nestle another thing in between our kitchen aid mixer, vitamix, coffee maker, soda stream, food processor … so many gadgets … that I use surprisingly regularly. A crock pot also felt like giving up. Surrendering my culinary creativity to mushy foods that all taste and look the same. Not to mention the myriad of crock pot recipes that call for condensed soups, seasoning packets and all of those industrial food products that I just can’t get behind.

And then, around Thanksgiving, I was visiting my mom. We ran errands all day, hopping in and out of the car, driving from place to place, and got home around six in the evening. And her house, her house smelled amazing. The kind of smell that really makes you feel taken care of and instantly banishes the “what the hell are we having for dinner tonight” worry. Unbeknownst to me, my mom had thrown leeks, potatoes and vegetable stock into her crockpot before we’d left to take on the days errands, and now all that was left to do was to puree the soup and make a salad. This was when I realized that I could indulge the convenience of the crock pot without giving up good food.

chili-verde-4

Fast forward to Christmas, and my grandparents gifted us a crock pot. Since then I’ve been experimenting with a few new recipes, including my mom’s leek and potato soup. Most of these recipes could also be braised in a dutch oven or made on the stovetop, but I must again admit it is insanely nice to come home to a meal that is nearly ready to eat.

This chili verde is a mashup of several different recipes from around the Internet. It’s hard to go wrong when you combine tomatillos, chilis and pork. They’re made for each other. This version is not particularly spicy and makes enough for at least eight meals. Not surprisingly, it freezes well and you can easily reheat it in your crock pot and enjoy another round of chili verde at a later date. I’m starting to see why people like these things.

But, I still resist the microwave. It is my last stand.

Chili Verde
1 1/2 lbs tomatillos, taken out of their husks
1 onion, cut into eighths
6 cloves of garlic
4 serrano chilis, stemmed and de-seeded (Keep in mind that the heat of serranos is quite variable, it’s good to taste them to see how spicy they are before you increase the amount of chili you use)
3 lbs pork shoulder, peeled and cut into 1.5″ cubes
4 yukon gold potatoes, cut into 1″ cubes
1 orange, juiced (or 1/4 cup orange juice)
4 cups of chicken stock
1 teaspoon cumin
1 teaspoon dried oregano
2 bay leaves
salt and pepper
olive oil/bacon fat/lard
fresh cilantro, sour cream, avocado, cabbage, lime, tortillas and hot sauce/salsa for serving

chili-verde-1chili-verde-2

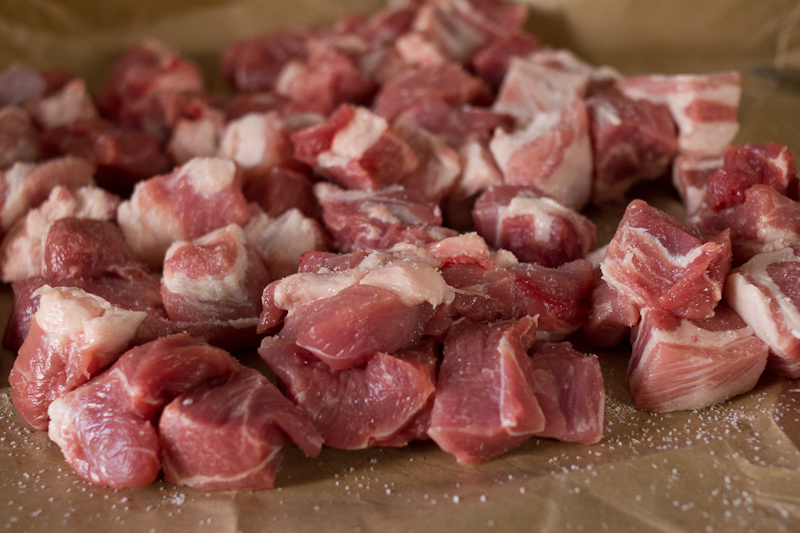
Cut your pork into one and half to two inch cubes. Season it with salt. Heat a tablespoon of oil/bacon fat/lard in a non-stick skillet over medium high heat. In batches, brown the pork on all sides. Put your first batch aside and brown the next few pieces. Continue until you’ve browned all of your pork. It will probably take somewhere in the neighborhood of 20 to 30 minutes to brown this much pork, but it adds a ton of flavor into the final dish.

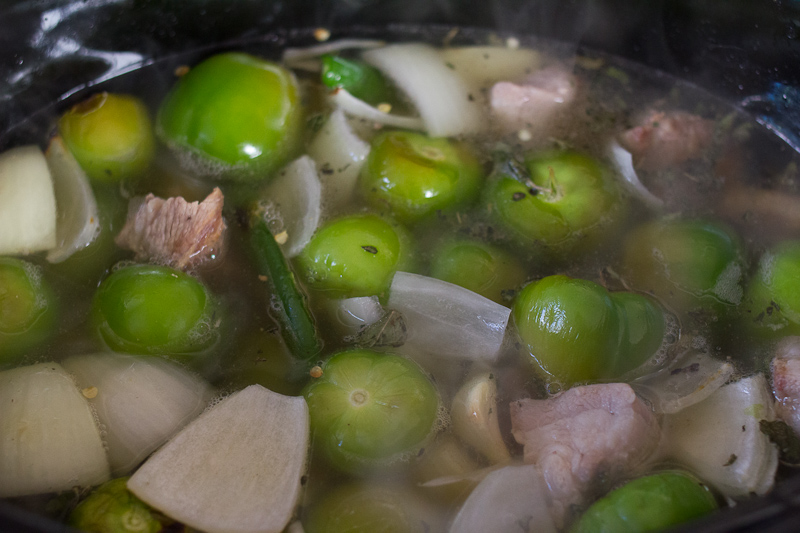
Meanwhile, line a baking sheet with parchment paper and spread the tomatillos, onion, garlic, and serrano chilis into a single layer. Turn your broiler to high and char the vegetables. You’re looking for a deep dark spots on all of the vegetables and for the tomatillos to look deflated. Pour your charred vegetables and all of their juice into your crock pot vessel, or into a dutch oven.

After you’ve browned all the pork, deglaze with some orange juice, chicken stock or water. Be sure to scrape up all the delicious browned bits and add those into your crock pot, along with all of the pork.

Add the potatoes, chicken stock, cumin, oregano, bay leaf, a little salt and pepper, and cover. (FYI – If this is too much to do before work, you can prep the recipe up until this point and refrigerate the entire dish, and then start the cooking in the morning). Set your crockpot to high and cook for 6 hours, or low and cook for 8 to 10 hours. If you’re cooking in a dutch oven in the oven, preheat your oven to 300° F and cook for about 4 hours. The pork should be super tender by the end of the cooking time, and the vegetables will have become a soupy sauce.

Taste for seasoning. Add more salt and pepper as needed. It may need salt, especially if your broth was unseasoned. I serve chili verde in a soup bowl with tortillas, cilantro, sour cream, avocado, salsa and cabbage on the side. This way folks can make their own mini tacos with whichever fixings they like best, and you get to drink up that delicious tomatillo broth at the end of the meal.

chili-verde-3

-Emily

Ps. Do you have a crock pot or crock pot-adaptable recipe that you love? Please send it my way! We’ll soon tire of the three dishes I’ve added into the meal rotation and I’ll need new ones to try. Gracias!

Categories
Recipes

new old fashioned

old-fashioned-1

I’m having trouble collecting my thoughts about the end of 2014 and the start of 2015. It seems healthy to start the year off with a little reflection, but instead of taking a few moments to think about what I’ve learned this past year, my brain is instead obsessing with how I’m going to tetris the generous gifts we received from our families into our tiny apartment. Not to mention, all ten seasons of Friends are now on Netflix, and I got a crock pot for Christmas that begs experimentation, I just had to make these cookies yesterday, go see this striking art exhibit today, and then go buy four pounds of sushi rice. I confuse myself by how I can simultaneously have enough focus to spend eight hours dip-dying two hundred tiny pieces of paper (wedding!), but cannot bring myself to sit down for an hour to write.

So instead of thoughts on life and learning and new years, I’ve got a cocktail for you. We make it often (I use it as an excuse to eat maraschino cherries), and we also made it on New Year’s Eve. It’s delicious. Serve it to your friends.

New Old Fashioned
2 oz of bourbon or rye
1 bar spoonful of muscovado rich syrup (from our favorite food podcast, Spilled Milk)
1 dash angostura bitters
a maraschino cherry and an orange peel for garnish (get Luxardo Cherries, they’re more expensive but so worth it)

Make the rich syrup. Combine 2 parts muscovado sugar with 1 part water in a small saucepan. Heat and stir until the sugar dissolves. You could also use brown sugar – they have similar flavors. Store rich syrup in a jar in the fridge.

In a cocktail shaker, combine the bourbon/rye with the rich syrup and a dash of bitters. Stir with ice for 20 to 30 seconds and strain into a cocktail class. Garnish with a cherry and an orange peel. Use your potato peeler to peel of a generous amount of orange zest.

Wishing you love, happiness and good vibes for 2015!

-Emily

Categories
Recipes

curried butternut squash over farro

I don’t believe in diets. I think diets ruin food for you and for everyone you eat with. Instead I prefer to live by Julia Child’s philosophy—everything in moderation, including moderation. Life is just too short, and you only get one of ’em. But, I do believe that your body will tell you what it needs if you take the time to listen. After an epic weekend of eating with Jordan’s family (pizza at Pizzeria Delfina, followed up by cocktails at Hard Water, followed up by House of Prime Rib, topped off with brunch at Nopa), my body was screaming for some vegetables.

I love vegetables, and though it might be blasphemous to say so seeing as some folks around here consider bacon a food group, vegetables are probably the only food I could tolerate eating weeks on end. We have salad (or slaw or sautéed greens) with dinner every night, but salad as a meal just doesn’t cut it when you bike upwards of 20 miles a day like Jordan does. Plus, when you write a blog called The Answer is Always Pork, you can’t get away with hawking sissy vegetarian food. This dish is my compromise between the need to detox and the need to fuel my handsome nerdlover’s brain and body.

curried-butternut-squash-farro-1

So here we have a salad that does not mess around. Curry powder takes butternut squash to a wonderful warm and spicy place. Farro is one of the best grains out there—it blows quinoa out of the water; nutty and chewy, you don’t miss meat. Top it all with a lemony-yogurt sauce that adds just the right amount of brightness and you’ve got yourself a wining dinner.

It’s also all kinds of flexible. Instead of butternut, you could use whatever squash you’ve got lying around. Or heck, roast up some carrots or parsnips or celeriac. You can serve it hot, serve it at room temperature, serve it cold. Anything goes. This salad is your oyster. Now doesn’t my detox sound like fun?

Curried Butternut Squash & Farro with Lemon-Yogurt Sauce

For the squash
1 butternut squash, peeled and cut into 1 inch cubes
1 teaspoon – 1 tablespoon Indian curry powder (depending on how hot and fresh your curry is)
1 tablespoon olive oilFor the yogurt sauce
1/2 cup greek yogurt
1/2 lemon juiced
salt and pepper

1 cup farro (I like Trader Joe’s Quick Cook Farro – it cooks in 10 minutes and has great texture)
cilantro, for serving

curried-butternut-squash-farro-2 curried-butternut-squash-farro-3

Preheat your oven to 400 F. Line a baking sheet with parchment paper. Peel and cut your butternut squash into cubes. Toss with some olive oil, salt and curry powder and spread evenly on a baking sheet. I’d taste your curry powder—mine was very mild and I needed to use quite a bit to actually taste it when it was put up against the flavor of the squash. You can taste a piece of squash part of the way through cooking and if it is too mild, sprinkle on some more curry. You want this squash to pack a punch. Bake 30 – 40 minutes, until the squash is tender.

Meanwhile, mix the yogurt with lemon juice. Season with salt and pepper.  While the squash is baking, bring a pot of salted water to boil. Cook the farro according to the package directions, drain and toss with a little olive oil.

To serve, mound some farro up on a plate. Scoop on a healthy helping of squash and top with the lemon yogurt. Or throw it all in a tupperware and eat it like a heathen with your hands in the park because you forgot a fork. Either way, enjoy!

-Emily

curried-butternut-squash-farro-4

Categories
Recipes

on pear galettes and worrying

Last weekend, Jordan and I cooked a special dinner together. It was our standard birthday/anniversary/Valentine’s day meal—a beautiful steak, buttery potatoes, a good bottle of wine. We have it just a few time a year and it’s wonderful every time.

I remember the steak dinner that started this tradition, I think it was our third anniversary.  Jordan cooked at his parents’ house. I was on break from college. He made steak au poivre, roasted fingerling potatoes, beet salad and a dark chocolate souffle. I still have the menu he typed up for the occasion. (Can we just pause for a second an appreciate that he typed a menu for the occasion, adorable.) The meal has been a constant of our relationship ever since.

Now that a few years have passed, we’ve worked out all the kinks. Jordan handles the steak, usually simply grilled and finished with butter. I make the sides and dessert. Dessert is the only part of the menu that changes and this weekend I decided to make a pear galette.

pear-galette-7

So it was Saturday afternoon and I was standing in my kitchen making the galette. Now, those of of you who know me well, know that the type of experience I’m about to tell you about doesn’t really happen to me. I’m pretty solidly grounded, and frankly, if this happened to you and you told me about it, I’d probably think it was a little new-agey and nuts. Now putting all that aside, as I stood there slicing the pears for my galette, I was transported. For just a few minutes, I felt like the person I’m meant to become. She was calm and confident and capable. I folded the dough up around the pears and I knew in this very concrete way that everything is going to be alright.

It’s been an especially anxious year, full of lots of worrying on my part about big things and small (but mostly big, if we’re honest).  And so it was such a relief to just know that everything is going to be ok, that I’m going to be ok. Knowing that this happier, calmer version of myself is out there and that I’ll get there some day—even if it isn’t today or tomorrow or this year—put me at peace in a way nothing else has. I’ve tried to reason myself into feeling this way for months, but it took this unexpected, out of body experience to actually get the message across. Strangely, or maybe not so strangely, I have a pear galette to thank for that.

pear-galette-6

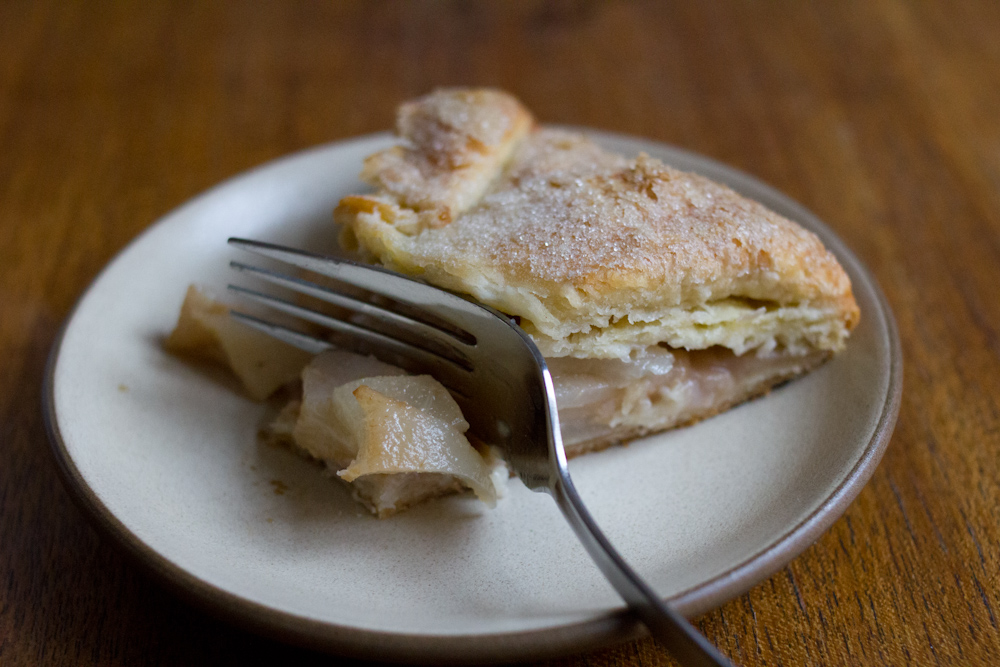
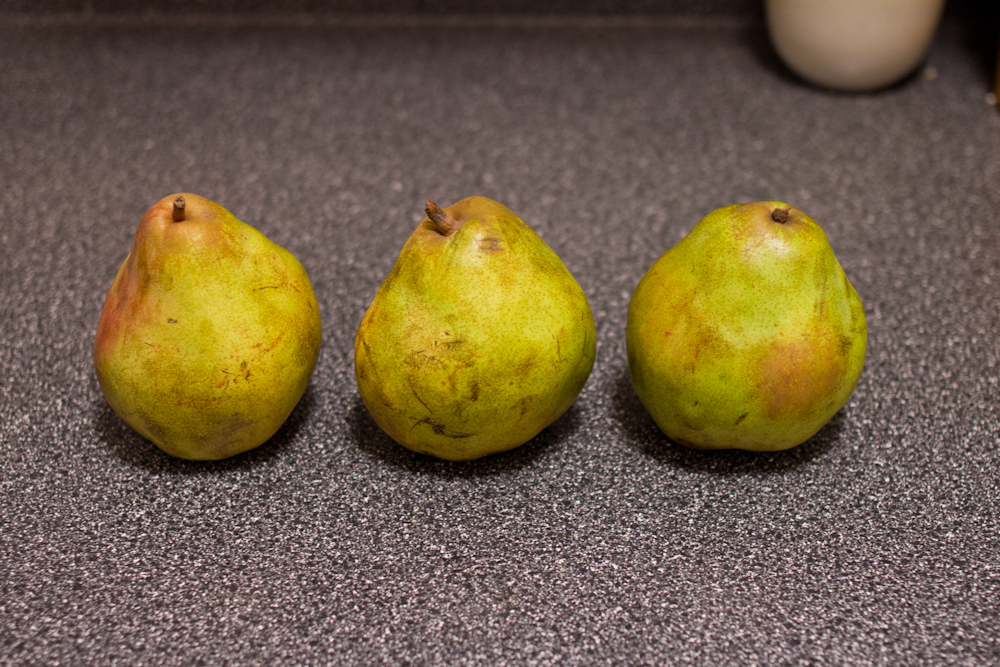
As for the pear galette, it was divine. Comice pears are perfect for pie—the texture can stand up to baking and they don’t get too sweet. The galette has just enough spice to accent the flavor of the pear, but doesn’t overpower it. I’d recommend you hurry and make your own before comice pears are done for the season.

Comice Pear Galette, with inspiration from Lindsay Shere, a longtime pastry chef of Chez Panisse
For the crust (makes two)
2 1/2 cups all purpose flour
1 1/4 teaspoons kosher salt
2 1/2 sticks unsalted butter
about 5 tablespoons ice water

For the galette
3 comice pears, peeled and sliced thin
2 tablespoons flour
2 tablespoons sugar
1/2 teaspoon cinnamon
1/4 teaspoon nutmeg
sugar for dusting

In a food processor, combine flour and salt. Remove the butter from the fridge and cut into 1 inch cubes. Add them to the flour mixture. Process until the butter chunks are about the size of peas. Add the water and pulse a few times to combine. Divide into two equal balls, flatten into 1″ thick discs, wrap in plastic wrap and refrigerate for at least two hours or overnight.

pear-galette-1 pear-galette-2

Preheat your oven to 400° F. Line a baking sheet with parchment paper. Peel the pears and slice them into thin slices. In a small bowl, combine the flour, sugar and spices. Dust a surface with flour and roll out the dough until it is about 1/4 inch thick. In the center of the dough, sprinkle the flour mixture. Arrange the pear slices in a mound on top of the flour mixture. Fold the dough up around the filling. Brush the dough with water and sprinkle with a heavy dusting of sugar.

Transfer to a parchment-lined baking sheet and back for 40 minutes to 1 hour, until browned and bubbly in the center. You can also form the galette, cover in plastic wrap and return it to the fridge until you want to bake it.

pear-galette-5pear-galette-4

I like to serve mine warm with ice cream and usually put it into the oven as we’re sitting down to dinner. It’s also really good for breakfast. Just say you need to take a good photo for your blog. Enjoy!

-Emily

pear-galette-8


Categories
Recipes

julia child’s beef bourguignon

For my 22nd birthday, my Nonnie gave me a copy of Mastering the Art of French Cooking. Sitting at her kitchen table, as I unwrapped the tome that changed home cooking so monumentally, she gave me some advice. “Make the beef bourguignon first. And do not skip the bacon.”

beef-bourguignon--6

Like she is on most things culinary and otherwise, my Nonnie was right. Julia Child’s beef bourguignon is perfection, worth every bit of effort, and the bacon is absolutely essential. It is easily the best braised beef I’ve ever made and I’m sure those who’ve had the pleasure of eating it with us in years since I was first gifted the book would also agree.

And what is winter for if it isn’t to embrace braising? Dedicate an afternoon to Julia’s beef bourguignon, and don’t even think about skipping the bacon.

beef-bourguignon--10

Beef Bourguignon, adapted very slightly from Mastering the Art of French Cooking by Julia Child
6 oz bacon, cut into 1/2″ pieces
3 lbs lean stewing beef, cut into 2″ chunks (we used chuck roast)
1 carrot, sliced
1 onion, sliced
salt, pepper, olive oil
3 cups red wine
2 – 3 cups beef stock
1 tablespoon tomato paste
2 garlic cloves, mashed
1/2 teaspoon thyme
1 bay leaf, crumbled
20 small white onions, brown-braised
1 lb fresh mushrooms, cut into halves or quarters, sautéed in butter

beef-bourguignon--2 beef-bourguignon--3

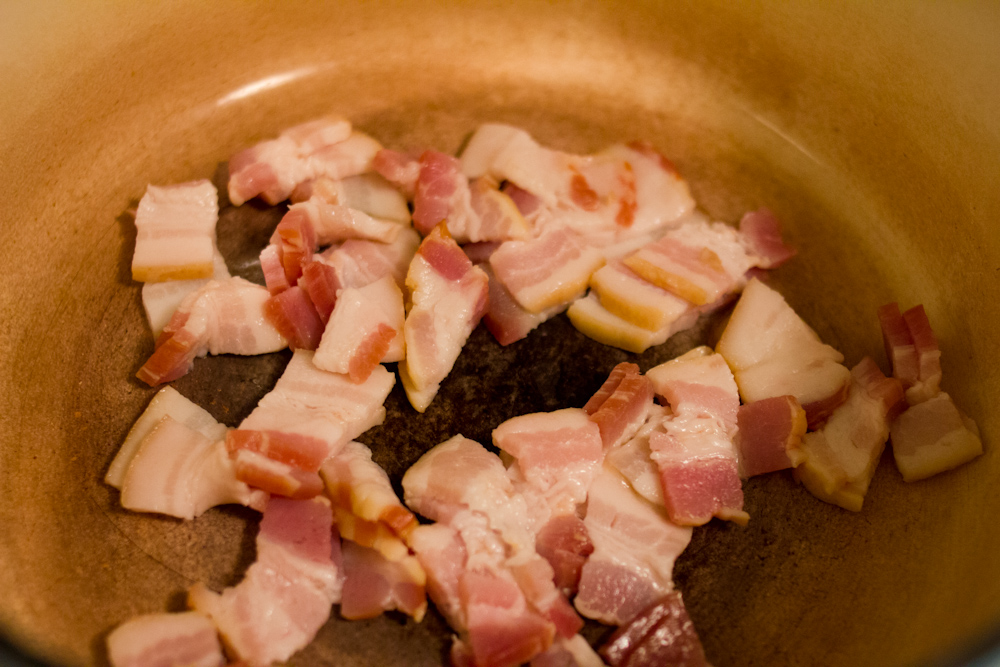
Preheat your oven to 450° F.  If you know your bacon is quite smoky, you may want to boil the bacon in some water for a few minutes to take out some of the smoke flavor before you sauté it. This is what Julia recommends, but I usually skip this step and skip right ahead to sautéing. In a cast iron pot, sauté the bacon over medium heat. After the bacon has browned lightly, remove it with a slotted spoon and set it aside. Take the pot with the bacon fat off the heat.

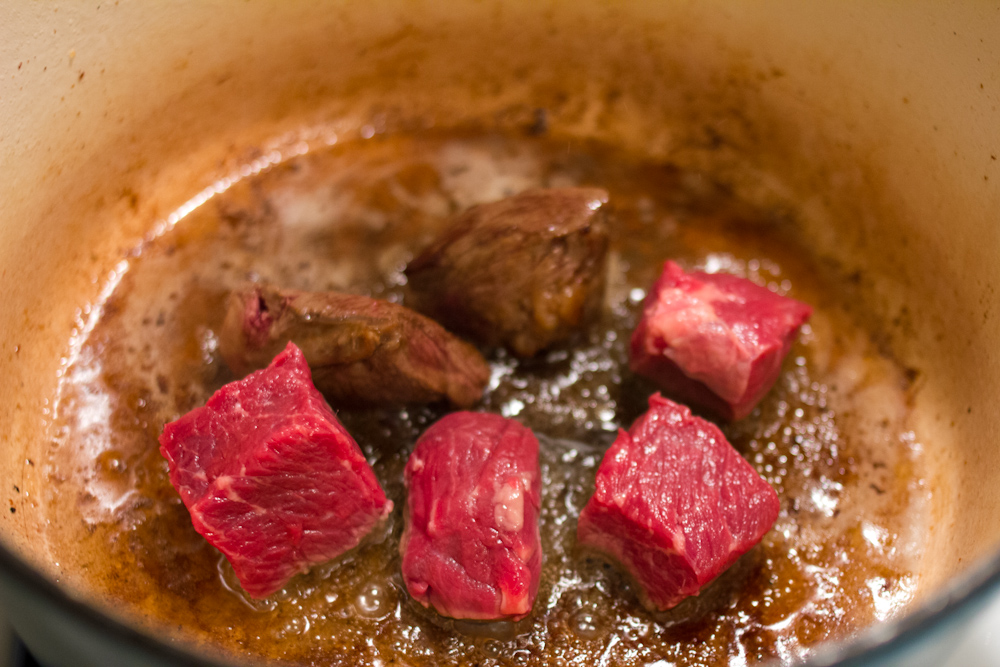
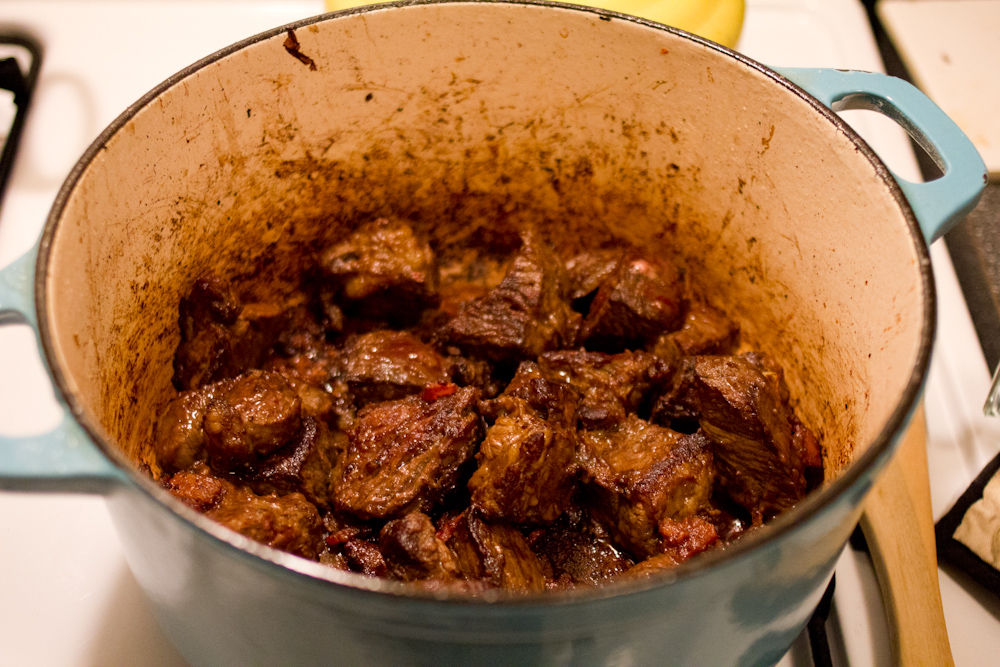
Cut the beef into 2 inch cubes and then pat them dry with paper towels. Heat the pot with the bacon fat over medium high heat until the fat is nearly smoking. If your bacon didn’t render off much fat, I would add a tablespoon of oil to the pot. Add a few cubes of the beef. Sear them, letting them sit without disturbing them for a few minutes per side, until they are a deep brown. Be sure to not crowd the pan or the beef will steam instead of browning. For about 2.5 pounds of meat, I did mine in four batches.

beef-bourguignon--4 beef-bourguignon--5

While the beef is browning, cut the onion and carrot into chunks. After browning the last of the meat, add the vegetables. Brown them slightly and then remove them and set them aside.

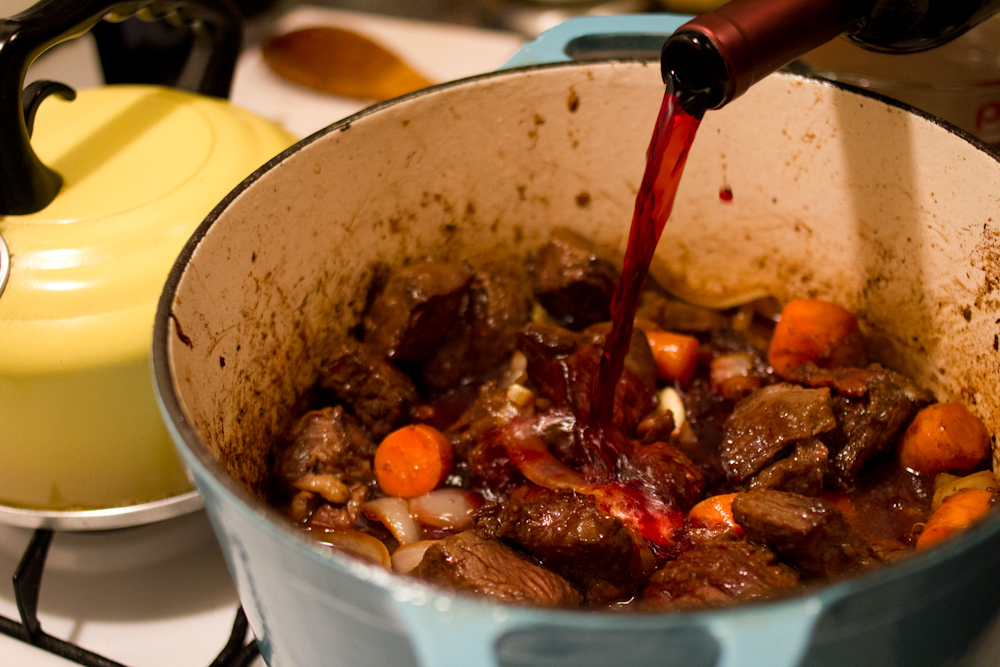
Put the beef and bacon back into the pot. Add 1 teaspoon of salt and some fresh black pepper. Toss the beef to coat. Add 2 tablespoons of flour and toss to coat again. Set the pot in the middle of your 450° oven and cook for 4 minutes. Toss the meat and cook for another 4 minutes in the oven. Reduce the heat of the oven to 325°. Return the pot to the stove top and add the vegetables, wine, broth, tomato paste, garlic, and herbs. The meat should be just barely covered by liquid. Bring to a simmer on the stove top and then place in the oven. Cook in the oven for 2 1/2 to 3 hours. The meat is done when a fork pierces it easily.

While the beef is cooking, prepare the pearl onions. For the pearl onions, peel them if using fresh. If using frozen, defrost in water. Melt 1 tablespoon of butter over medium heat. Add the onions and brown them on each side. Once browned, add 1/2 cup beef stock, a pinch of thyme and a bay leaf and reduce the heat to low. Let simmer covered for 20 minutes, until the onions are cooked through.


beef-bourguignon--8

If you’re making this in advance, you can prepare the beef and onions up until this point and then refrigerate them. You can then rewarm the beef by simmering it on the stove over low heat for 15 – 20 minutes before serving. I like to saute my mushrooms the day of serving because they are pretty easy to do while you’re cooking the potatoes.

In the last 45 minutes of cooking for the beef or 45 minutes before you want to eat, peel a few potatoes and cut them into quarters. Put them in a sauce pan and cover them with water. Season the water until it taste like sea water. Bring the potatoes to a boil and cook until tender, about 20 – 25 minutes. Drain the potatoes and mash them, adding a bit of butter, milk, salt and pepper to taste. I usually do this in my kitchen aid mixer.

For the mushrooms, clean 1 pound of mushrooms and then cut them into halves or quarters depending on their size. Sauté over medium heat in 2 tablespoons of butter, until browned and cooked through, about 10 minutes.

When the meat is tender, remove it from the oven and place on the stovetop. Skim off any fat that may be floating on the surface of the meat. In my experience, there is very little beef fat to skim off, but I generally cook with leaner grass-fed beef.  You skim off any fat to prevent a greasy gravy because greasy gravy is gross. Taste the sauce for seasoning; it may need a little salt or pepper. Before serving, add in the braised onions and sautéed mushrooms to pot along with the beef and vegetables. Serve over mashed potatoes with a gravy boat of extra sauce on the side.

beef-bourguignon--9

-Emily


Categories
Recipes

garlic confit, the key to sautéed greens

This right here is how to make any leafy green more palatable. Before garlic confit, I was a very reluctant eater of cooked leafy greens. I’d pretty much avoided them since childhood—terrifying brick of spinach microwaved directly from the freezer, anyone?—and only occasionally ate them as an adult because I know they’re good for me. But since our discovery of garlic confit, I’ll happily eat them alongside any main course.

Garlic confit has all the delicious flavor of garlic without the harsh bite. It’s ridiculously easy to make and delicious in pretty much anything – vegetables, pasta, mashed potatoes, spread on bread.  Do yourself a favor, make a big batch, keep it in your fridge and bust it out anytime you’ve got a bunch of kale, spinach, chard, or mustard greens languishing. Because of our CSA, we usually have several bunches of greens on hand and make this once or twice a week.

03-30-13-31

Garlic Confit, from Ad Hoc at Home
2 heads of garlic, peeled
1 cup flavorless oil, like grapeseed or safflower

Peel the cloves of garlic and put them in a small saucepan. Cover completely with oil, about 1 cup. Turn the heat on to very low and let the garlic simmer for 30 minutes to 1 hour, depending on the size of the cloves. When the cloves are soft, it’s done. Pour garlic and garlic oil into a glass jar and store in the fridge.

03-30-13-32

Sauteed Greens with Garlic Confit
4 cups leafy greens and stems (this will cook down significantly)
several cloves of garlic confit and its oil
salt and pepper
1/2 lemon, juiced

03-30-13-33

Put several cloves of garlic and some of the oil in a large saute pan. Turn the heat to medium. Add your greens and let the begin to wilt, about 2 minutes. Once they’ve released some of their water and shrunken some, use tongs to stir them around. Cook another 2 minutes and turn the heat off. Season well with salt and pepper, finish with a squeeze of lemon.

-Emily

Categories
Recipes

chicken pot pie

The chicken pot pie of my childhood was made by Marie Callender’s. It was a personal pot pie, and it baked in the oven for what seemed like an eternity. My favorite part was the crust coated in that creamy pot pie sauce. Well, this chicken pot pie a thousand times better, though it’s a time commitment. Between making the pie crust, roasting chicken, blanching vegetables, making a bechamel, you’re in it for the long haul. But it’s worth it.

I’d recommend making chicken pot pie when you have left over meat from roasting a chicken and chicken enchiladas or chicken soup don’t sound appealing. I’d also recommend it for a crowd – a single slice will fill you up. You could very easily make this ahead of time, freeze it and bake it straight from the freezer, adding 20 – 30 minutes of additional bake time.

03-30-13-6

Chicken Pot Pie, adapted from Ad Hoc at Home
Pie Crust
2 1/2 cups all purpose flour
1 1/4 teaspoons kosher salt
2 1/2 sticks unsalted butter
about 5 tablespoons ice water

Filling
1 cup red skinned potatoes, peeled and cut into 1/2 inch pieces
1 cup carrots, peeled and cut into 1/2 inch pieces
12 pearl onions, peeled
1 cup celery, cut into 1/2 inch pieces
3 bay leaves
3 thyme sprigs
1/2 tablespoon peppercorns
1/2 cup peas
2 cups cooked chicken, cut into 1/2 inch pieces

Bechamel
3 tablespoons butter
3 tablespoons flour
3 cups milk
1 teaspoon kosher salt
black pepper
1 tablespoon parsley
1/2 teaspoon fresh thyme
pinch of cayenne

Make the pie crust the night before. In a food processor, combine flour and salt. Remove the butter from the fridge and cut into 1 inch cubes. Add them to the flour mixture. Process until the butter chunks are about the size of peas. Add the water and pulse a few times to combine. Divide into two equal balls, wrap in plastic wrap and refrigerate.

03-30-13-1

Preheat your oven to 375 degrees. Remove the dough from the fridge and let it warm just slightly. Roll out the dough and place one piece in a 9 inch pie pan. Cut around the edges and put it back in the fridge. Roll out the second piece of dough into a 12 inch round. Place on a baking sheet and put it back in the fridge.

03-30-13-2

Bring a pot of water to boil. Add the bay leaves, thyme and pepper corns. Salt the water until it tastes like sea water. Blanche the potatoes, carrots and onions for 8 minutes. Add the celery and cook for another two. Strain the vegetables from water, pour them onto a sheet pan and discard the spices.

In a medium pan over medium heat, melt the butter. Add the flour and whisk for 2 to 3 minutes, until the mixture is light brown. Whisk in the milk. Let the sauce come to a boil to thicken, stirring often. Remove from the heat. Add the salt, pepper, thyme, parsley and cayenne. Make sure you’re happy with the seasoning.

03-30-13-3

Remove the bottom crust from the fridge. Scatter the blanched vegetables, frozen peas and chicken in the pie shell. Pour the bechamel over the pie. Beat an egg in a small bowl. Moisten the rim of the shell with some of the egg. Top it with the other crust. Pinch around the edges and cut off the excess. Brush the top with the egg. Cut a small vent in the top crust to allow steam to escape.

03-30-13-4

Bake on the lower rack of 375 degree oven until the crust is golden brown, 45 minutes to 1 hour. Remove the pie and let rest for 10 minutes. Cut into wedges and serve warm.

03-30-13-5

-Emily

Categories
Recipes

katie’s leek and butternut squash risotto

The thing that I love most about food is that certain dishes can be so tied to a place, to a moment, to a particular understanding of yourself, that when you taste those dishes again all of those memories come flooding back and you’re transported, regardless of how much or little time has passed. In my humble opinion, this is the one of the best reasons to record and share recipes.

Like my Nonnie’s pecan shortbread cookies, my mother’s red beans and rice, and Jordan’s steak au poivre, this risotto holds a special place in my heart. My friend Katie made it for my going away dinner before I left D.C. for Buenos Aires and again during our last year of college for an intimate dinner with a few friends. It is beautiful, seasonal and has just enough going on to keep your attention. Most of all, it is comforting and absolutely delicious. I’m thankful she gave me the recipe, along with several others from her repertoire.

2-13-13_-4

Leek and Butternut Squash Risotto, from Katie Norton
1 large butternut squash, peeled, seeded and cut into 1/2 inch cubes
4 tablespoons olive oil
6 cups chicken stock
3 large leeks, white and light green parts only, sliced thinly, about 3 cups
2 cups arborio rice
1/2 cup dry white wine
1/2 cup heavy cream
1/2 cup parmesan, grated
2 tablespoons fresh sage, chopped finely
salt and pepper

One year ago: Braised Short Ribs
Two years ago: Alice’s Cauliflower Soup

2-13-13_-1

Preheat your oven to 400 degrees. Toss the squash with 2 tablespoons olive oil and salt and pepper. Spread in an even layer on a baking sheet and roast until tender, about 40 minutes. You can roast the squash in advance, or do it while you’re babysitting the risotto.

Bring the stock to a simmer in a large saucepan. Reduce heat to low, cover and keep warm.

2-13-13_-2

In a large, heavy saucepan or dutch oven, heat the remaining 2 tablespoons of olive oil over medium-low heat. Add the leeks and saute until soft, but not brown. Add the rice and stir until the outside of the kernels becomes translucent, but the inside is still white. Add the wine and simmer until absorbed, stirring constantly.

2-13-13_-3

Add the stock, 1/2 cup at a time, stirring until it is absorbed. Continue to add stock by the 1/2 cupful until the rice is tender and the mixture has thickened, stirring frequently with each addition. Once tender and creamy, add the squash, cream, parmesan and sage. Season with salt and pepper and enjoy warm!

-Emily

Categories
Recipes

pot roast for amanda

My grandmother, my Nonnie, makes a wonderful pot roast. So good is her pot roast that she clandestinely prepares it in her home kitchen and sneaks it into a bay area restaurant where it is then served to their very happy patrons. “Nonnie’s Pot Roast” it’s called on the menu and I’m proud to say that the “Nonnie” on the menu isn’t some imaginary Italian grandma, she is my Nonnie and she’s a damn good cook—though we’re not actually Italian.

When my friend Amanda needed a pick me up—and don’t we all know that sometimes the only think that can really pick you up is a good home-cooked meal—I decided to make my Nonnie’s pot roast. As it turns out, pot roast is one of Amanda’s favorite childhood meals, and I think she was smitten. Pot roast might not be the prettiest or the most elegant of dishes, but it will certainly warm your soul, and some days that counts for a lot.

1.17.13-13

Nonnie’s Italian-Style Pot Roast
2 lbs chuck roast
2 tablespoons olive oil
1 large onion, diced
4 cloves of garlic, chopped
2 bay leaves
1 – 8 oz can chopped tomatoes
3 – 4 large carrots, cut into chunks (or a handful of baby carrots)
1/2 cup red wine
2 – 3 cups beef broth (enough to nearly cover the meat)
salt and pepper

Buttermilk Mashed Potatoes
2 lbs yellow potatoes (I like Yukon Golds)
4 tablespoons butter
1/3 – 1/2 cup buttermilk
salt and pepper

One year ago: Pizza with Pancetta, Shallot and Mascarpone
Two years ago: Passionfruit Mousse

Preheat an oven to 325 degrees. Season the chuck roast liberally with salt and pepper on both sides. In a large cast iron pan, heat 2 tablespoons of olive oil over medium-high heat. When the oil is shimmering, add the meat. Sear both sides, until deep brown in color about 8 – 10 minutes per side. Remove the meat and set aside.

1.17.13-10

Reduce the heat to medium-low. Saute the onions in the meat juices until translucent, 6 – 8 minutes. Add the garlic and saute a two minutes more. Add the wine to deglaze, making sure to scrape the browned bits off the bottom of the pan. Return the meat to the pan. Add the bay leaves, tomatoes, carrots and broth. Return to a boil.

1.17.13-11

If you’re making the roast on a weeknight, you can make the pot roast up to this point and refrigerate it then finish it in the oven the next day. Or you can cook it for a few additional hours until you’re ready for bed and then finish it for another hour or so the next day. It will need about 3 hours braising time in a low oven to become perfectly tender, and will happily adjust to whatever schedule suits you.

Cover the pot with a lid and place in a 325 degree oven. Cook for 3 hours, until the meat is tender. When you have about 1 hour left on the cooking time, start the mashed potatoes.

1.17.13-12

Peel the potatoes and cut them into quarters. Put them in a large pot and cover with water. Season the water liberally. It should taste like sea water. Cover and turn the heat to medium-high. Cook potatoes 25 – 35 minutes, until fork-tender. Drain the water. Add the butter and beat the potatoes with a mixer or mash with a potato masher. Add the buttermilk and mix well. Season with salt and pepper. Potatoes generally need a lot of salt to taste good – keep this in mind while seasoning your potatoes.

Remove the pot roast, carrots and bay leaves from the braising liquid and set aside. Use a blender or immersion blender to puree the braising liquid. It should turn into a thick tomatoey gravy. Season the gravy with salt and pepper, if needed. Slice the pot roast into thin slices.

Mound mashed potatoes on a plate. Top with slices of pot roast and carrots. Pour the gravy over the meat and potatoes. Bring some gravy to the table. Enjoy!

-Emily