Categories
Recipes

enchiladas suizas

enchiladas-suizas-1-text
I’ve been thinking about making these enchiladas for months. Correction, I just looked at the issue of Saveur from whence this recipe came and it was the August/September 2012 issue.  So I’ve been dreaming of these enchiladas for a year. I saw their picture in the magazine and knew I had to eat them. When we discovered a few weeks ago that there was indeed a latino market in our neighborhood (I cannot explain why this discovery took three years), my dream was realized.

Enchiladas suizas are a specialty originally served in a Mexico City department store called Sanborns. Their recipe is apparently the best and while there are stateside renditions, those supposedly pale in comparison. Chicken-filled tortillas blanketed in a creamy tomatillo salsa, topped with salty, melted cheese. Ya, I can see how those would win an enchilada contest.

And so I made them. And they are indeed amazing. They make all the other enchiladas feel sad and inferior with their spicy, tangy, creamy, cheesy majesty. Now every time I have enchiladas, I will wish they were these enchiladas. If that doesn’t convince you to make them, you cannot be saved.

enchiladas-suizas-8enchiladas-suizas-13

Enchiladas Suizas, adapted from Saveur Magazine, Aug/Sept 2012
2 lbs tomatillos, husks removed and rinsed
2 serrano chilis, stemmed
2 poblano chilis
1 cup cilantro, roughly chopped
1 cup sour cream
1/2 teaspoon cumin
4 cloves garlic, roughly chopped
kosher salt, fresh black pepper
8 corn or flour tortillas
3 cups cooked shredded or chopped chicken
1 1/2 cups grated queso Oaxaca (or mozzarella)

The first question is, do you have shredded chicken sitting in your fridge? You do, you lucky duck. You don’t, no problem. Heat your oven to 425° F. In a small baking dish, bake four boneless, skinless chicken thighs for about 20 minutes, until the internal temperature is 165°. Take them out of the oven, let them cool and chop or shred with a fork, depending on your preference.

enchiladas-suizas-4

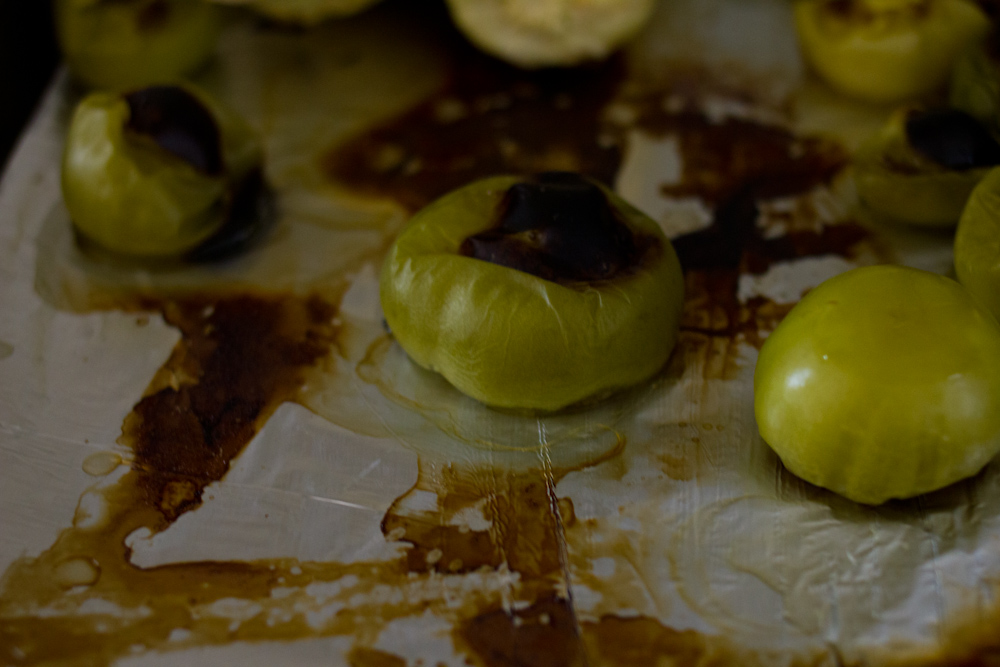
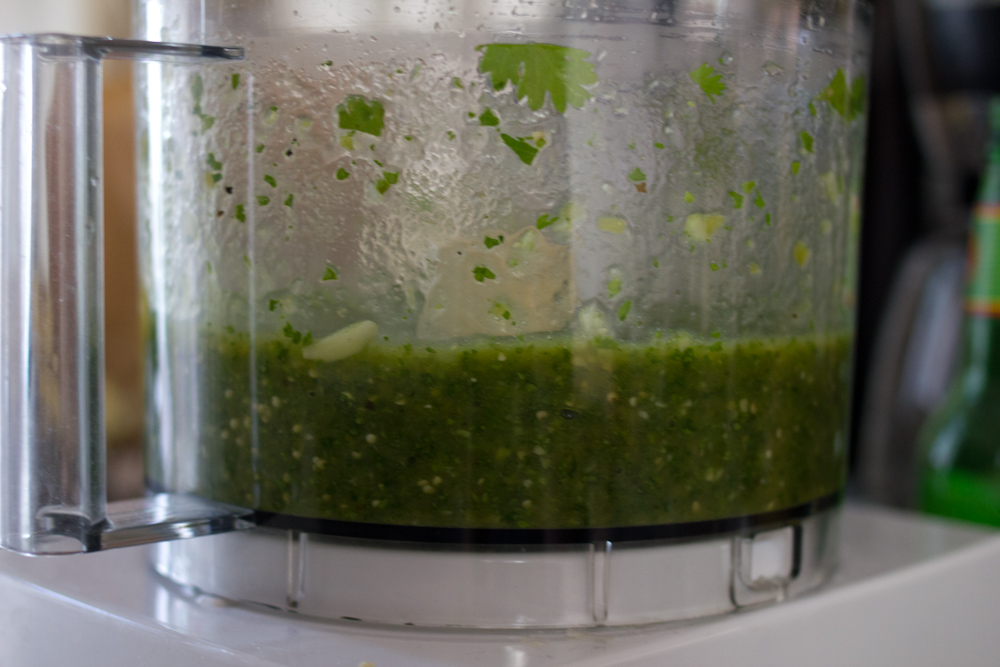
Arrange your oven rack to be four inches from your broiler and heat broiler to high. Line a baking sheet with tin foil. Broil tomatillos, serranos and poblanos, until blackened, turning occasionally to brown all sides. Let cool for about 10 minutes and discard any skins. I did a half-hearted job of removing the skins and it turned out just fine. Remove the stem and seeds from the peppers and chop into rough chunks. Transfer tomatillos, serranos and poblanos to a blender or food processor. Add the cilantro, cumin, garlic, and a pinch of salt. Plus to combine. Add the sour cream and whizz until smooth. Taste for seasoning. Season with more salt and pepper.

enchiladas-suizas-5enchiladas-suizas-6

To assemble, coat the bottom of a baking dish with about 1 cup of the sauce. In a large bowl, combine chicken with 1 cup of the sauce. Toss to coat all the chicken. Grate the queso Oaxaca. If using corn tortillas, you’ll need to fry them for a minute or two in some vegetable oil so that they are pliable enough to roll into tubes. If you’re a gringa and have an undying love for flour tortillas, you’re good to go.

enchiladas-suizas-7

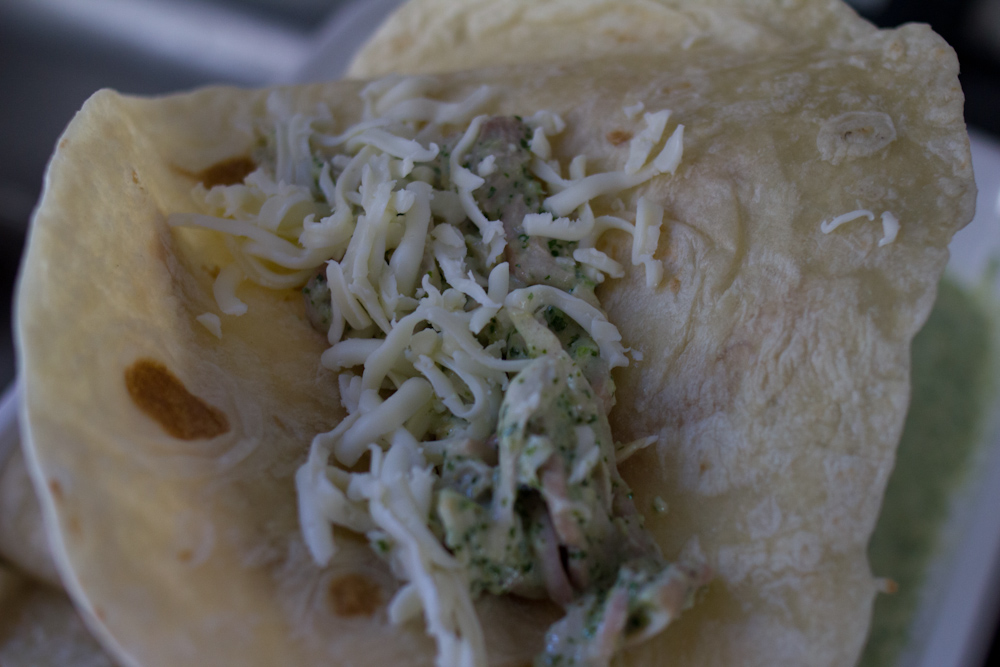
Divide sauced chicken evenly among the tortillas. Sprinkle with a little bit of cheese and add to the sauce-coated pan. After you’ve rolled all the enchiladas, cover the dish with the rest of sauce and sprinkle with a healthy dose of cheese.

enchiladas-suizas-9 enchiladas-suizas-11

Heat your oven to 375° F. Bake enchiladas until the sauce is bubbling and the cheese is melted, about 25 minutes. Take care not to bake the enchiladas too long, you don’t want that luscious sauce to evaporate. Remove from the oven and let cool 10 minutes. Serve with plenty of sauce, crema and the salsas of your choice.

enchiladas-suizas-14

Pico de Gallo
1 lb fresh tomatoes, chopped
1/2 red onion, diced
1/2 bunch cilantro, chopped
1/2 – 1 jalapeño, stem and seeds removed, diced (depending on how spicy the pepper)
2 – 3 limes, juiced
salt

In a medium bowl, combine tomatoes, onion, cilantro, jalapeño and lime juice. Season with salt.

enchiladas-suizas-2

Roasted Corn Salsa
2 ears of corn, roasted over a gas stove, broiled or grilled
1/2 red onion, diced
1 – 2  limes, juiced
salt

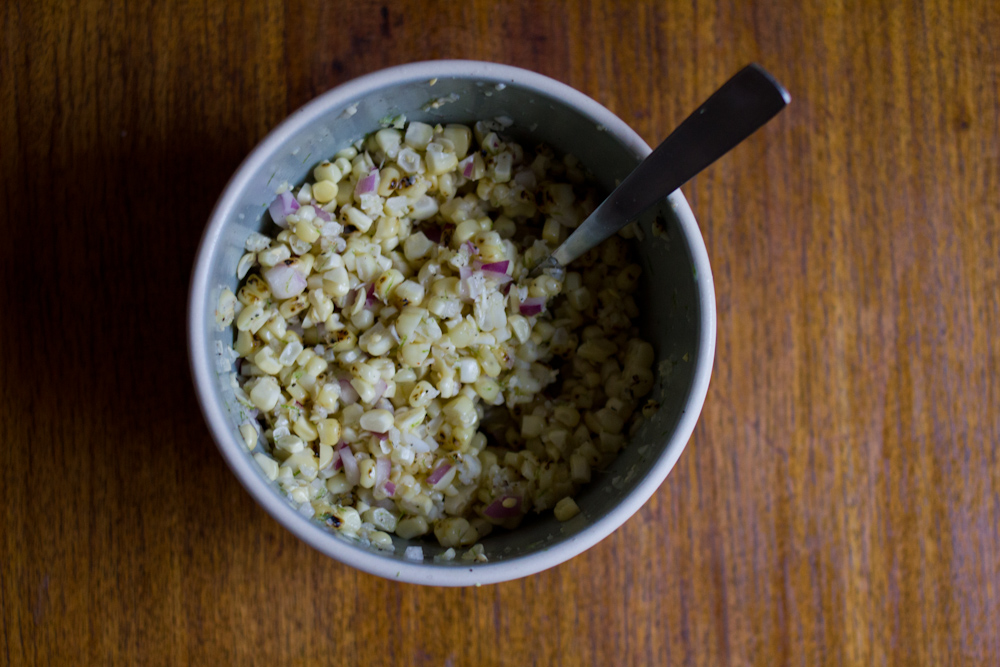
Roast your ears of corn over a gas flame, until they are browned in parts, but still uncooked in others. Cut the corn off the cob. Combine in a medium bowl with the red onion and lime juice. Season with salt.

enchiladas-suizas-3enchiladas-suizas-12

Quick and Easy Black Beans
2 cans black beans
1 small onion, diced
3 cloves of garlic, chopped
olive oil
salt, pepper
ancho chili powder

In a medium sauce pan over medium-low heat, saute the onion until translucent, about 8 minutes. Add the garlic and saute another minute more. Add the cans of black beans and their juice. Reduce heat to low. Season with salt and pepper. Add a good pinch of ancho chili powder. Ancho chili powder is great in this recipe. It adds smokiness and depth, and because black beans have such a mild flavor, the ancho is able to really shine. Simmer until about half of the liquid has evaporated. Serve topped with crema.

enchiladas-suizas-15

-Emily


Categories
Recipes

heavenly cheesy buns

I’ll just put this out there up front, you should probably make these cheesy buns this weekend. Eat them for breakfast, lunch or dinner (or for all three!)—you won’t be disappointed.  Imagine the puffy dough of a perfect cinnamon roll and then swap the sweet cinnamon filling for sharp cheddar cheese and onion. Yep, pretty much perfect. And, I’ve even got a secret to share so you can have them for brunch without even waking up at an ungodly hour.

1.17.13-9

One year ago: Best Chocolate Pudding
Two years ago: Ad Hoc at Home Brownies 

Sharp Cheddar Cheesy Buns, adapted from the Smitten Kitchen Cookbook
For the dough
3 cups (375 g) all-purpose flour
1 teaspoon salt
a few grinds of black pepper
1 tablespoon sugar
2 1/4 teaspoons (or one 7 g packet) of instant yeast
1 cup milk (if you want the dough to rise easier, warm the milk to about 100 degrees)
4 tablespoons melted butter, cooled to lukewarm

For the filling 
1/2 cup grated white onion (about half an onion)
1 1/2 cups grated sharp cheddar cheese (you could substitute swiss, provolone, mozzarella or use a mixture)
2 teaspoons fresh dill, minced (you could also use 1 teaspoon of fresh thyme or rosemary)
1/4 teaspoon salt
a few grinds of black pepper

First make the dough. You can make the dough the night before you plan to serve the rolls for convenience’s sake, but you can also make it the day of if you plan to serve them for dinner. They take about 5 hours in total, but most of that is rising time.

1.17.13-3

Combine the flour, salt, pepper and sugar in a large bowl, preferably the bowl of a mixer with a dough hook. In a medium bowl, whisk the yeast in the milk until it dissolves. Add the melted butter into the milk mixture. Pour the milk mixture into the flour and mix them together with the paddle attachment or a wooden spoon until a shaggy ball forms.

Switch to the dough hook. Knead the dough on low speed for about five minutes, until the dough is smooth and a slightly sticky ball has formed. You can also do this by hand on a lightly floured counter.

Place the dough in lightly oiled bowl and cover with plastic wrap. Place the bowl in your off oven and let it rise until doubled, about two hours. I find that my house is too cold for yeasted bread doughs to rise well without putting them in my oven with my pilot light to keep them warm. If it is warm in your house, you can just leave the dough on the counter and appreciate your insulation.

While the dough is rising, make the filling. Combine grated onion, cheese, dill, salt and pepper together in a medium bowl. Set aside. Line the bottom of a 9″x 13″ baking dish or two 9″ round baking pans with parchment paper.

1.17.13-5

After the dough has risen, turn it out onto a lightly floured counter. Roll it into a 12″ x 16″ rectangle. With the long edge facing you, spread the filling in an even layer, leaving a 1/2″ margin on the far edge. Roll the dough tightly and seal the far end. Using a sharp knife, cut the log in half, then cut each half into thirds, then cut each third in half. You should have 12 rolls. Space them evenly in the baking dish, leaving room around each roll for it to expand.

1.17.13-6

Let the rolls rise in an off oven for another two hours, until doubled again. Alternately, you can cover with plastic wrap and put in the fridge to cook the next day.

One hour before you want to serve the rolls, remove them from the fridge. Place them in an off oven. Fill a dish below the rolls with boiling water. Let them rise for 30 minutes, until puffy. Remove the rolls from the oven.

Preheat your oven to 350 degrees. Brush the tops of the rolls with 1 tablespoon melted butter. Bake for 20 – 25 minutes until the cheese begins to brown and bubble. Serve immediately. Don’t worry, they won’t last long.

-Emily

Categories
Recipes

broiled mushrooms with mozzarella

Because my commute to and from the office is just over two miles, I listen to a lot of podcasts. One of my favorites is the Spilled Milk Podcast by food writers Molly Wizenberg and Matthew Amster-Burton. Tasty recipes usually make an appearance, but  most importantly, plenty of bad jokes and giggling are guaranteed. I recommend you listen in.

This recipe is from a recent episode. I listened to it on my way home from work and had to immediately go to the store and get the necessary ingredients because it sounded so good. Cheesy, earthy and under 15 minutes to prepare, this dish is perfect for a weeknight (or a lazy night). We had it as a main course with plenty bread and a salad, but it would also be a solid appetizer.

Broiled Mushrooms with Mozzarella, from the Spilled Milk Podcast
2 cups cremini mushrooms
4 oz fresh mozzarella (You could also use regular mozzarella if you didn’t want to spring for fresh)
2 t fresh thyme
olive oil, salt and pepper

Slice the mushrooms thinly, about 1/4″ thick. Place them on a lined baking sheet in a single layer. Drizzle with olive oil.

Tear the mozzarella into quarter-sized pieces and sprinkle over the mushrooms. Sprinkle with salt, pepper and thyme.

Broil 5 – 8 minutes, until the cheese is bubble and golden in spots. Serve with bread.

-Emily

Categories
Recipes

soft eggs with herb-gruyere toasts

Because we’ve both been swamped with work, we’ve been all about easy meals and there’s nothing like eggs and toast for a quick dinner. The recipe for these cheesy toasts is from Smitten Kitchen and like all of Deb’s recipes, it does not disappoint.

Soft Eggs with Herb-Gruyere Toasts, from Smitten Kitchen

16 sourdough bread batons
4 T butter, melted
1 t smooth dijon mustard
1/3 cup gruyere cheese, grated
1 T parsley, chopped
1 t thyme, chopped
salt and pepper
4 eggs

Heat an oven to 400 degrees. Cut the bread into batons. Mix the melted butter, dijon, cheese, herbs and salt and pepper in a large bowl. Toss the bread with the cheese-herb mixture.  Place in an even layer on a lined baking sheet. Bake 15-20 minutes, until golden brown.

Meanwhile, heat a medium pot of water until boiling. Cook the eggs for six minutes for a perfectly soft-boiled egg.  Serve with the toasts and enjoy!

Categories
Recipes

savory gougeres

There are so many wonderful pastries in the Tartine Bakery Cookbook that it can be hard to choose which one to dedicate your Sunday to. I decided on these savory gougeres because I had all of the ingredients on hand, and they didn’t seem impossibly difficult. (Jordan and I have an outstanding bet to see who attempts Tartine’s croissants first).  As it turns out, the gougeres were easier and faster to make than I expected.

Gouyeres are a French pastry made with a pate a choux base. To that eggy cream puff dough, you add gruyere cheese and plenty of fresh thyme and black pepper.  They’re often served as an appetizer in miniature form, but I made large dinner-roll-sized gouyeres—mostly because I didn’t feel like piping dough. You can serve the large ones on their own, or, because they are an incredibly light and airy, you can fill them like a pita.

Gougeres, from the Tartine Bakery Cookbook
1 1/4 cup nonfat milk
10 T butter
1 t salt
1 cup all-purpose flour
5 eggs
3/4 cup gruyere cheese
1 t freshly ground pepper
1 T fresh thyme, chopped

For the topping 
1 egg, beaten
pinch of salt
gruyere for sprinkling

Preheat the oven to 350 degrees. Line a baking sheet with parchment paper.

In a heavy saucepan, combine milk, butter and salt. Place over medium heat until the butter melts and the mixture comes to a full boil. Add the four all at once, stirring vigorously. Keep stirring until the mixture has formed a smooth mass and pulls away from the sides of the pan.

Pour the paste into the bowl of a stand mixer fitted with the paddle attachment. Add the eggs one at a time and mix on medium speed. When all of the eggs have been added, the mixture will be very smooth and shiny.

Add the cheese, pepper and thyme by hand with a spoon.

Spoon 3 inch rounds of dough onto the lined baking sheet. Brush with beaten egg and top with a sprinkling of salt and cheese. Bake 35 – 45 minutes, until browned.

When you remove the gougeres from the oven, poke them with a toothpick to release some of the steam to prevent them from collapsing completely. Enjoy warm from the oven or re-crisp by warming them in an oven for 10 minutes.

-Emily

Categories
Recipes

pasta with ricotta and marinated tomatoes

This is one of my absolute favorite summer dinners. I’ve shared the recipe before, but recently made a few improvements and thought I’d share it again. It is quick, light and you don’t need to turn on the oven—beneficial pretty much everywhere except San Francisco. It also features one of my favorite summer ingredients—tomatoes.

Like all simple dishes, the better the ingredients you put into the dish the better it will turn out. I recommend using a decent fresh ricotta over your typical dairy section fare and cherry tomatoes because they are more flavorful and less watery than other varieties.

Pasta with Ricotta and Marinated Tomatoes
1 basket cherry tomatoes, halved
1 lemon, zested and juiced
2 T olive oil
2 T each of fresh parsley, basil or chives, chopped (use any combination of herbs you have on hand)
1/2 T fresh thyme, removed from the sprig
1 lb pasta (shells or tubes are prefered)
1 clove garlic, grated
2 T olive oil
1 cup ricotta
1/2 cup grated parmesan
salt and pepper

Slice the tomatoes and put them in a medium bowl. Add the lemon zest, lemon juice, olive oil and herbs. Season with salt and pepper. Set aside. The longer you let this sit and marinate, the better.

Bring a pot of salted water to boil. Add the pasta and cook until al dente. Just before you drain the pasta, reserve 1/2 cup of the pasta water. Drain the pasta and return to the pot. Add the olive oil and grated garlic clove. Stir. Add the ricotta and parmesan. Stir just to combine. Plate a mound of pasta and top with the tomato-herb mixture. Enjoy!

-Emily

Categories
Recipes

orzo with spring peas and burrata

Jordan surprised me with this delicious meal a while back. It is light but still flavorful—a perfect summer dish.

Burrata is a fresh Italian cheese made from mozzarella and cream. The outer shell of the cheese is mozzarella and the inside is a mixture of  mozzarella and cream. It is amazing—sweet, milky and soft—perfect for topping pastas or salads. If you can’t find burrata, use fresh mozzarella instead. A poached egg would also be lovely with this pasta.

Orzo with Spring Peas and Burrata 
1/2 lb orzo pasta
1/2 cup parmesan, grated
2 T mint, sliced thinly
1 lemon, juiced
olive oil, salt, pepper
1 cup spring peas
2 T butter

Bring a pot of salted water to a boil. Meanwhile, shell the peas. Cook the pasta until al dente and drain. Rinse with cold water to cool the pasta. Once cool, toss with olive oil, lemon juice, parmesan, salt, pepper and mint.

In a saute pan over medium-low heat, melt the butter. Cook the peas until cooked through, but still quite fresh tasting, about 5 minutes. Pour over the pasta mixture and toss to combine. Top with half of a ball of burrata and serve.

This pasta dish can be a main course or a side dish. We had ours with a fennel sausage and sautéed Russian red kale.

-Emily

Categories
Recipes

fava beans with manchego cheese

It has been quite busy in Jobyland as of late. Two product launch campaigns and one major sale in a span of six weeks is a lot for one girl to handle. Thankfully, Jordan finished his semester last week and has been taking good care of me. Last Thursday, he made his famous paella. Paella is one of Jordan’s specialties, but this time he decided to experiment and cook the shrimp in a spicy tomato sauce, instead of cooking them along with the rice. Slathering paella rice with spicy tomato shrimp and a garlicy aioli after a long day of Photoshopping—yep, that’s a very good idea.

But, paella isn’t just one of those things you whip up. It takes a while to come together and so to tide a hungry Emily over, Jordan made marinated fava beans. They were simple and delicious, and only get better the more they sit.

Marinated Fava Beans with Manchego Cheese
1 cup shelled fava beans
1/4 – 1/2 cup olive oil
2 garlic cloves, sliced thinly
zest of one lemon, removed with a vegetable pealer
1/2 t fennel seeds, rosemary leaves and oregano leaves
salt and pepper
1/4 cup manchego cheese, cut into tiny cubes

Put a large pot of water to boil. Remove the fava beans from their pods. Fava beans come in a large pod and then have another external shell that needs to be removed before you eat them—annoying but worth it. Blanche the favas for a few minutes in boiling water, drain and remove their outer shells. Place them in a medium glass bowl.

Add the herbs, lemon zest and cheese. Pour olive oil over the mixture and season with salt and pepper. Let the mixture sit at room temperature for a few hours for the flavors to meld together. Serve with bread or crackers as an appetizer, or as a salad alongside your favorite spanish dish.

-Emily

Categories
Recipes

fettuccine alfredo with asparagus

Yay! Asparagus season is officially upon us! I love asparagus and happen to think it goes just wonderfully with cheese. Exhibit A: Grilled Cheese with Asparagus and Preserved Lemons. Exhibit B: Fettuccine Alfredo with Asparagus.

Fettuccine Alfredo with Asparagus
1 bunch asparagus
2/3 lb fettuccine
2 T butter
1 cup cream
1 clove garlic, crushed
2 cups parmesan, grated
salt and pepper

Put a large pot of salted water to boil. Slice the asparagus into one inch slices. In a small saucepan over low heat, heat the cream, butter and garlic. Once simmering, whisk in the parmesan. Season well with salt and pepper.

Add the pasta to the boiling water. After the pasta has cooked for 10 minutes, add the asparagus to the boiling water. Cook another 2 – 3 minutes and drain. Pour the sauce over the hot pasta. Toss and enjoy!

This is a real crowd pleaser and super easy to make, plus the asparagus addition makes it seem slightly less indulgent. Just do it. Your friends and lovers will be thrilled. And there’s few things better than being happy and full.

-Emily

Categories
Recipes

grilled cheese with asparagus and preserved lemons

Like I said, cheese sandwiches are all the rage. I had a version of this sandwich at Mission Cheese Shop a few weekends ago and it was delicious. I had to recreate it at home for Jordan.

Grilled Cheese with Asparagus and Preserved Lemons
4 slices of sourdough bread
2/3 cup fontina cheese, grated
1 T butter
4 stalks asparagus, cut into 1 inch pieces
1 preserved lemon, cut into very thin slices

Turn on the broiler. Spread the asparagus on a baking sheet. Drizzle with a little olive oil and sprinkle with salt and pepper. Broil the asparagus for a few minutes, until al dente and browned slightly.

Spread the bread with butter. Heat a nonstick saucepan over low heat. Put the bread in the pan butter side down, layer with cheese, asparagus and preserved lemon, top with another slice of bread. Cover the pan and let cook for about 5 minutes, until golden brown. Flip and cook the other side until golden. Cut in half and serve hot.

-Emily